We no longer support this browser. For an optimal experience, we recommend updating your browser.
Manage your personal schedule
Personal schedules allow you to manage the calls you receive based on day or date and time. Your company’s system administrator creates and manages the schedule for your company, but you can set and manage your own personal schedule if it differs from schedules and events created by your administrator. Your personal schedule consists of a single event or multiple events that direct your incoming calls when using features such as Sequential Ring, Simultaneous Ring, Selective Call Forwarding, etc.
Create your personal schedule for weekly, monthly, and yearly events. This feature is usually used for a main number, but you can also use it for your own office number.
Create a personal schedule
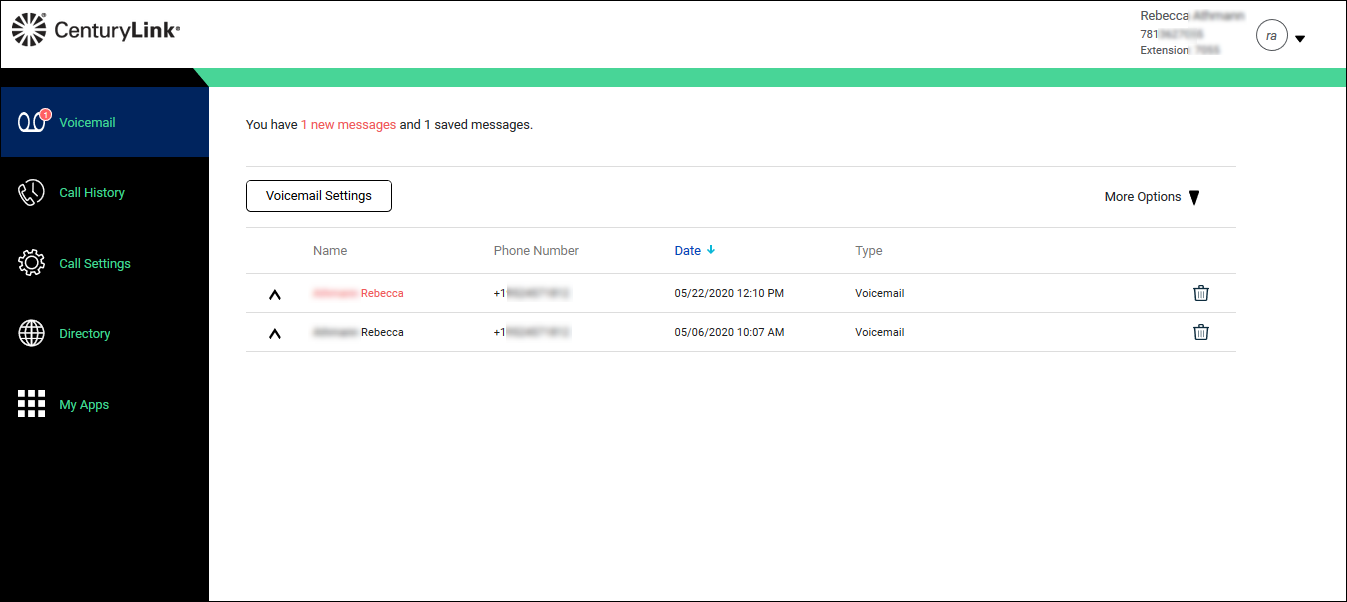
2. Open the Voicemail tab
3. Click Voicemail Settings
- Click the Call Settings tab. The Incoming Calls tab opens.
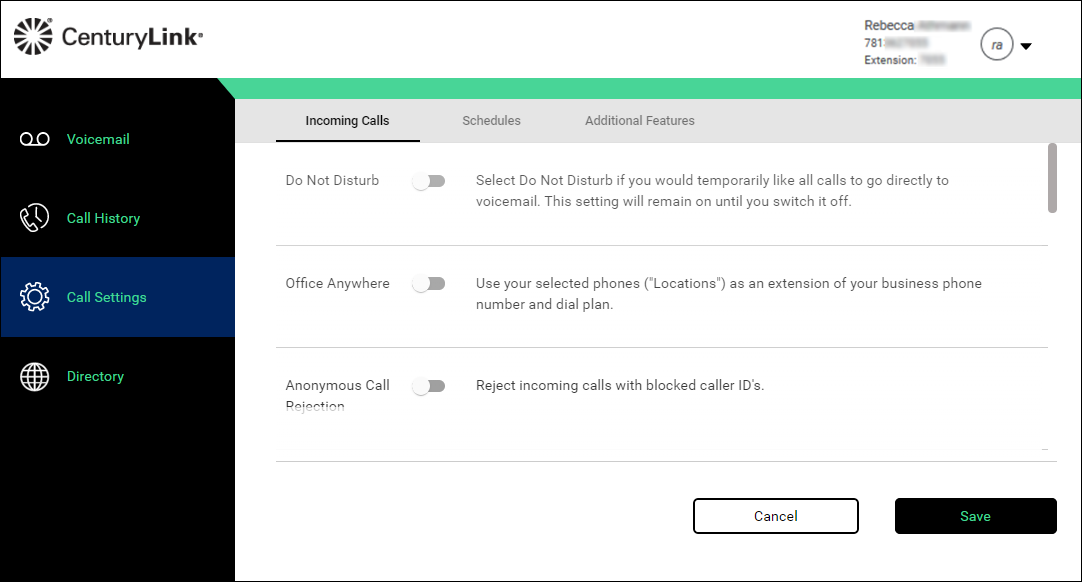
- Click the Schedules tab.
To delete a schedule, click the trash can next to it and then select Delete.

- Click New Schedule.
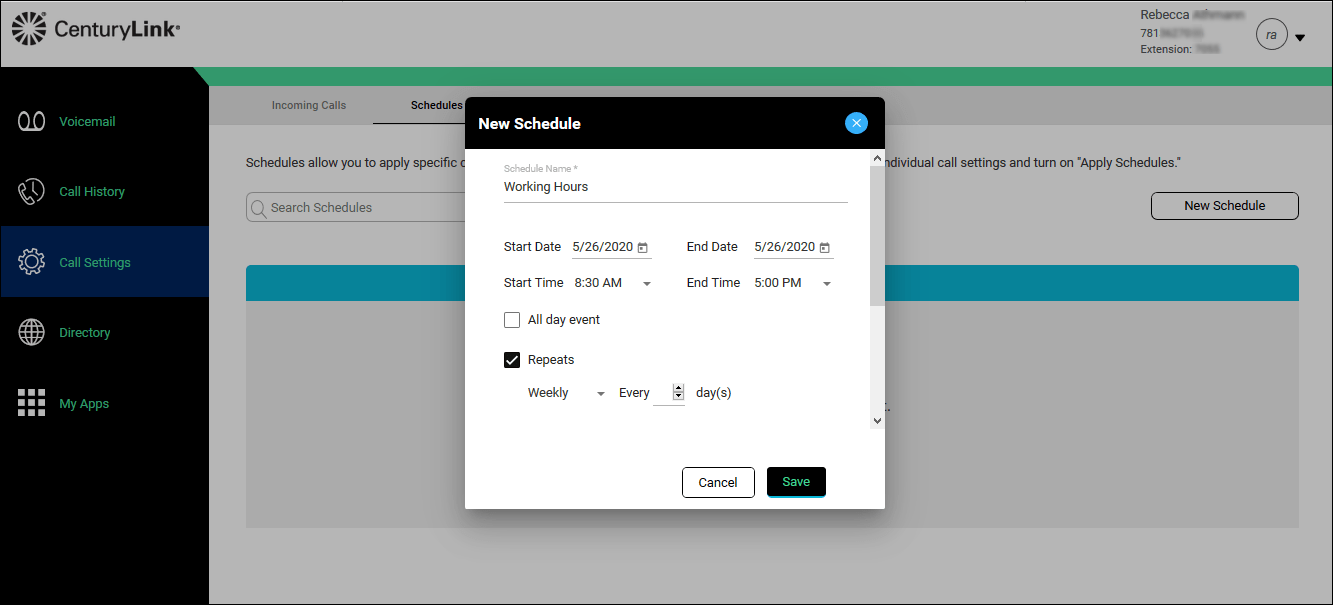
- In the Schedule Name field, type a name for the schedule.
- Click the calendar icon next to Start Date, then select a date for the event to begin.
- Click the calendar icon next to the End Date, then select a date for the event to end.
- If the event is all day, select the All day event checkbox.
- If the event occurs more than once, select the Repeats checkbox from the list
- Select Daily. (An End date isn’t necessary. If the checkbox is not selected, the schedule will continue until the schedule and events are modified or deleted.)
OR
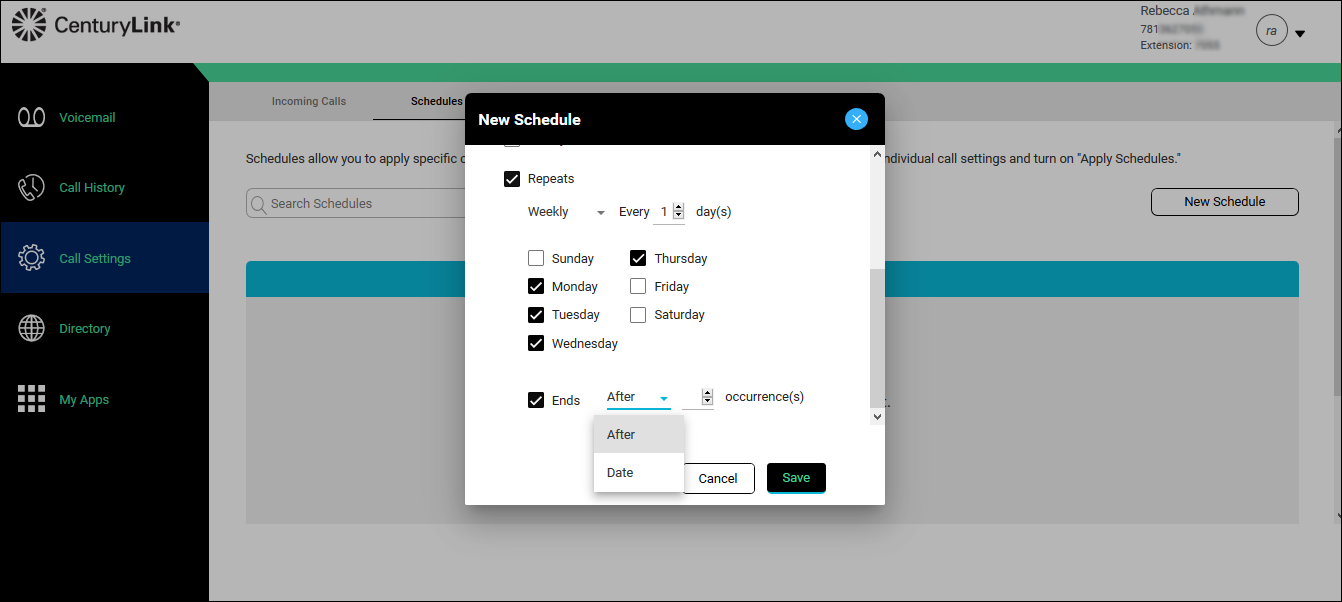
Select Weekly, then do the following:- Click next to Every, then type a number for how many days you want the event to repeat.
- Select the checkbox next to the day(s) of the week the event takes place on. (The number of days selected must be the same as what you entered for Every.)
- Select the End checkbox, then do one of the following:
- From the list, select After, then click next to occurrence(s), and type the number of occurrences the event will end after.
- From the list, select Date, then click on the calendar icon to select a date for the event to end on.
- Click Save.
Did you find the help you were looking for today?
About Lumen | About CenturyLink | Careers | Investor Relations | Newsroom | Legal | Privacy Notice | Tariffs | Customers with Disabilities | Site Map | Cookie Settings | CenturyLink in Your Area | CenturyLink.net | Quantum Fiber in Your Area | White/Yellow Pages | Centurylink Retailer
Residential | Small Business | Enterprise | ©2024 CenturyLink. All Rights Reserved.