How to set content controls with SmartNID WiFi
You can set parental controls on SmartNID WiFi when you sign in to your account on the web or in the app.
Create and manage groups
Creating groups is the first step in controlling content or access schedules for any given device or multiple devices together. As examples, you could group all your kid's devices, all your smart home devices, all devices in a particular room, or all TVs.
How to create a group
- Step 1
- Steps 2 & 3
- Step 4
- Step 5
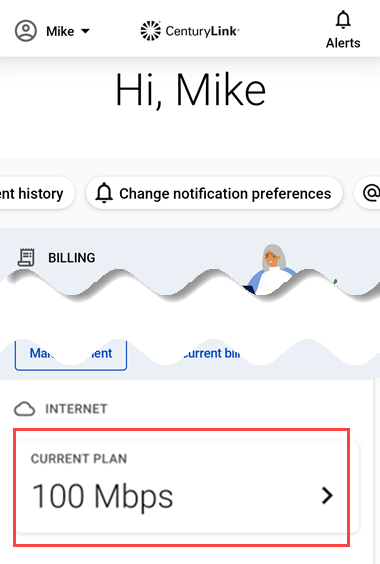
1. From your home dashboard, tap on your current plan in the Internet section.
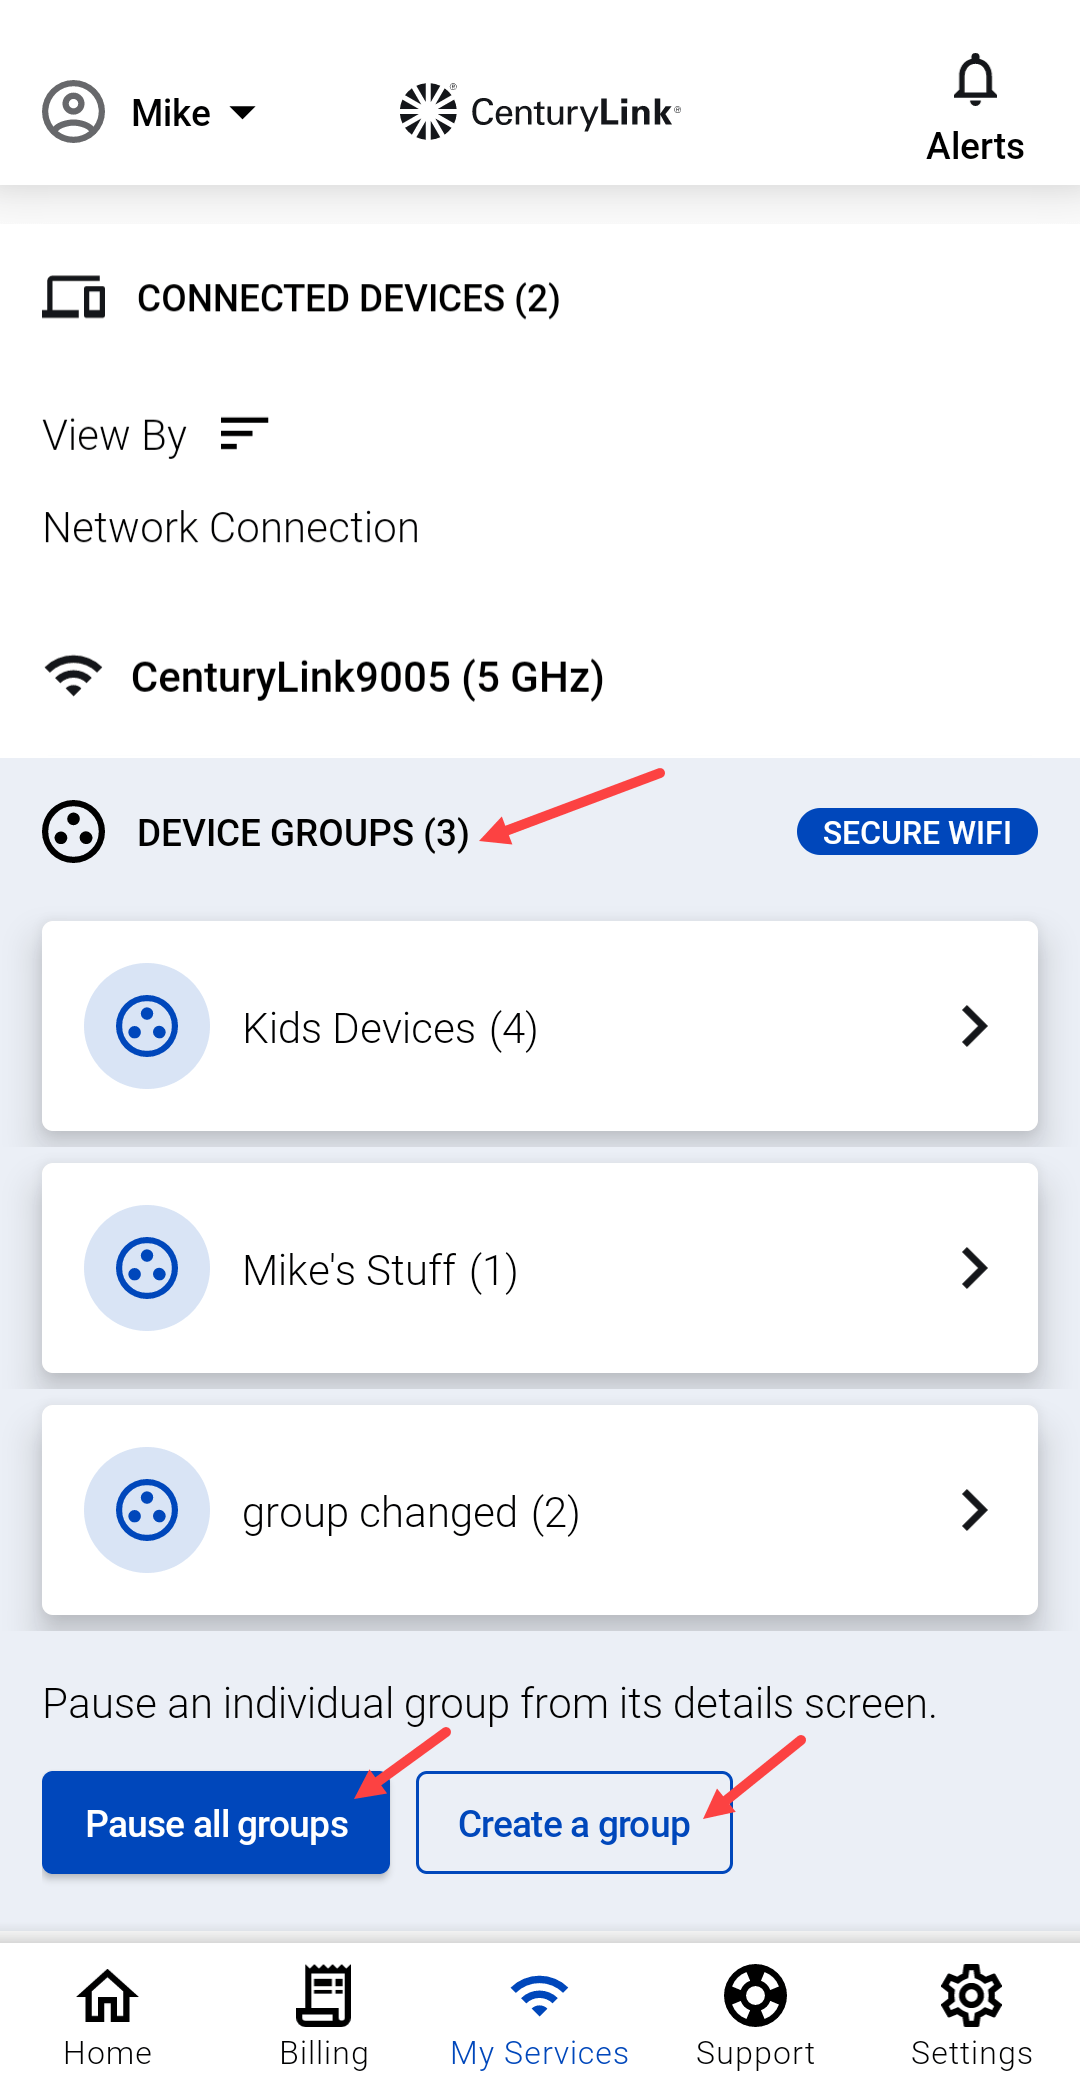
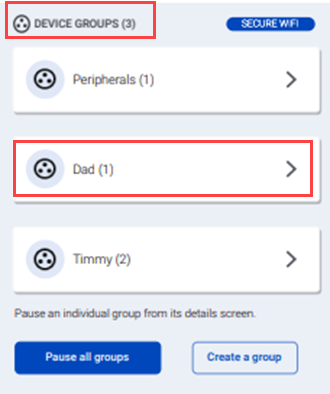
2. Scroll down to Device Groups. Tap on an existing group to manage it.
3. Select Create a group and give the group a name. Note that this is also where you can Pause all groups to block WiFi access across all groups, regardless of any schedules that have been set up.
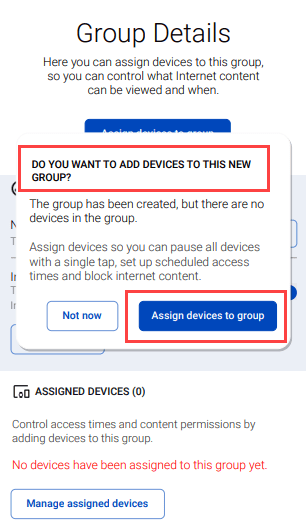
4. Tap the pop-up to Assign devices to group. If you select Not now, you can come back later to do this, but you must assign devices before the group will be active.
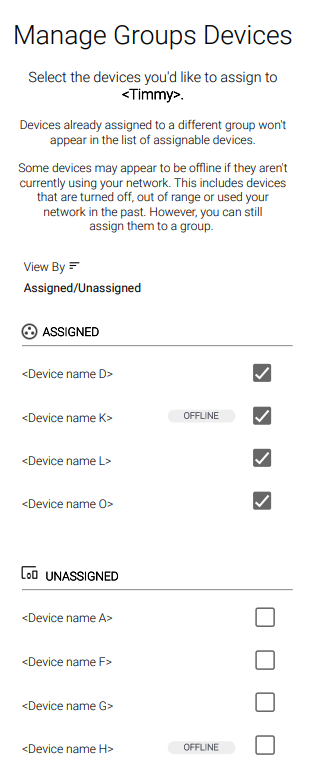
5. Select the devices you'd like to add to the group. You can select devices that are currently offline, as long as they have been connected to your network in the past. You cannot assign a device to more than one group to prevent conflicting settings. Tap Save.
You can restrict or allow access to selected categories or specific online content for a given group.
After you've assigned devices to a group, follow the steps below to manage content controls.
- Step 1
- Step 2
- Step 3
1. Select a group from the Device Groups section of the Internet screen.
2. On the Group Details screen, scroll down to the Block Web Content section and tap Manage blocked content.
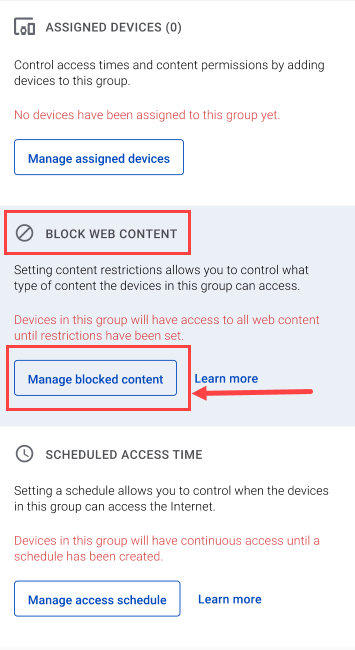
3. Tap the content categories you'd like to block on that group. Then tap Save. These types of content are now blocked on all devices in this group.*

Notes about content controls
1. Content controls will only work while a device is connected to your network. Mobile devices can get around content restrictions by connecting to the mobile network instead of WiFi.
2. Content categories are determined by various behind-the-scenes settings and algorithms for each website and app. There's no guarantee that category restrictions will catch everything.
Schedule or pause access
You can schedule time to block internet access for a group of devices or you can pause access at any time for a single device, a group, or all devices.
Note that schedules are created to BLOCK access to the internet during certain times. Outside of the scheduled times, access will be allowed.
Schedule blocked access for groups
After you've assigned devices to a group, follow the steps below to set a schedule.
- Step 1
- Step 2
- Step 3
- Step 4
- Step 5
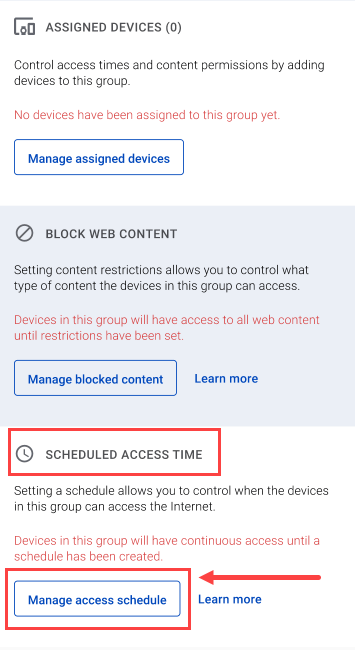
1. After you've created a group, select it from the Groups section of the Internet screen.
2. From the Group Details screen, scroll down to the Scheduled Access Time section and tap the button to Manage access schedule.
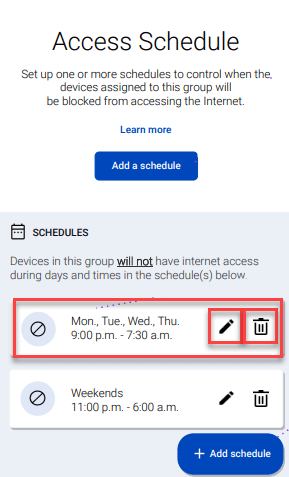
3. Tap on the Add a schedule button from the Schedule Access screen.
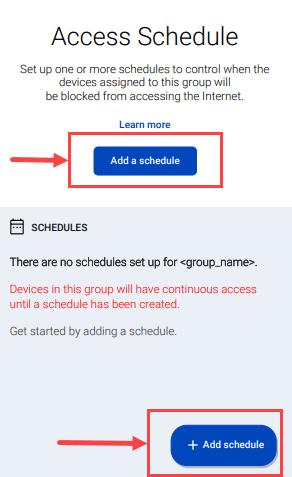
4. Select the days of the week and the times you want to block the devices in the group from accessing the internet.
Tap the SAVE when you've made your schedule.
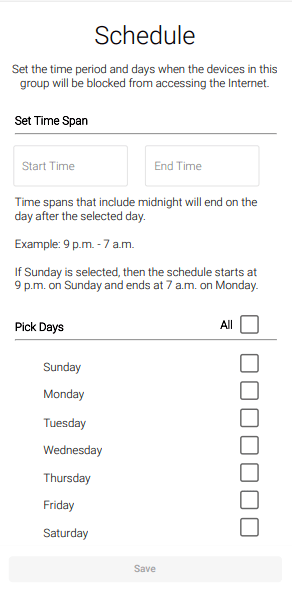
5. After you've created a schedule, you can edit or delete it from the Access Schedule screen.
Pause internet access - no schedule needed
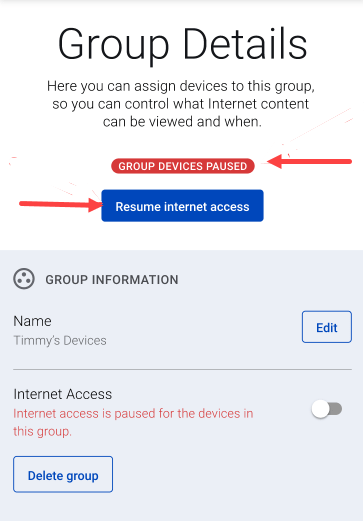
You can pause or unpause internet access for one device, for a group of devices, or for all devices.
From the Device Groups section, you can pause or resume access for devices in ALL groups.
From the Group Details screen, you can pause or resume access for devices in that group.
Fiber Topics
-
Manage account -
Move and cancel -
Appointments -
Troubleshooting -
Outages
Manage your CenturyLink Fiber account
Use the CenturyLink app to control your fiber network.


Was this information helpful?