We no longer support this browser. For an optimal experience, we recommend updating your browser.
Manage calling features from the user portal
Anonymous Call Rejection allows you to block incoming calls that don’t provide caller ID. The caller will hear a busy tone.
Barge In creats a three-way call by allowing you to barge in on a call in progress. The default setting for this feature is off. Find this feature under the Additional Features tab.
Block My Caller ID for Forwarded Calls lets you block your identity when you receive a transferred or forwarded call. By default this feature is turned off, and should remain in the off position. Find this feature under the Additional Features tab.
Business Continuity allows you to conduct business if you’re unable to access the network due a natural disaster or power outage. Use this feature to direct incoming calls to any other phone.
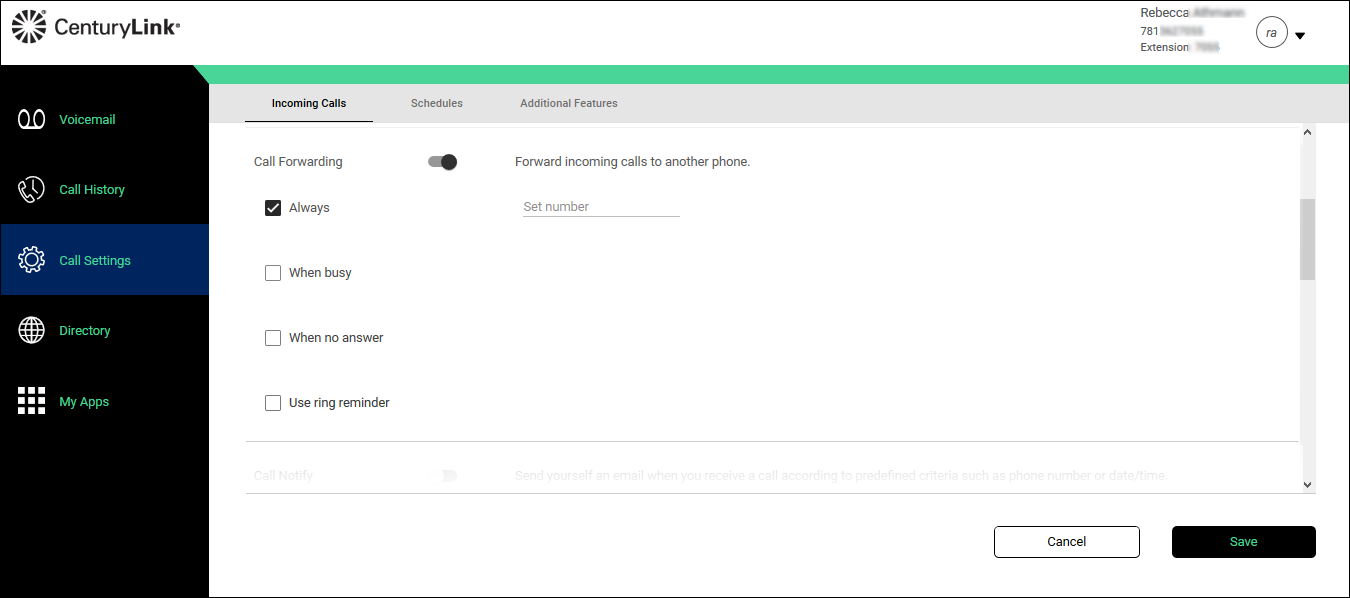
Call Forwarding allows you to send calls to another phone. You can choose to forward all your calls when your line is busy or you are unable to answer calls.
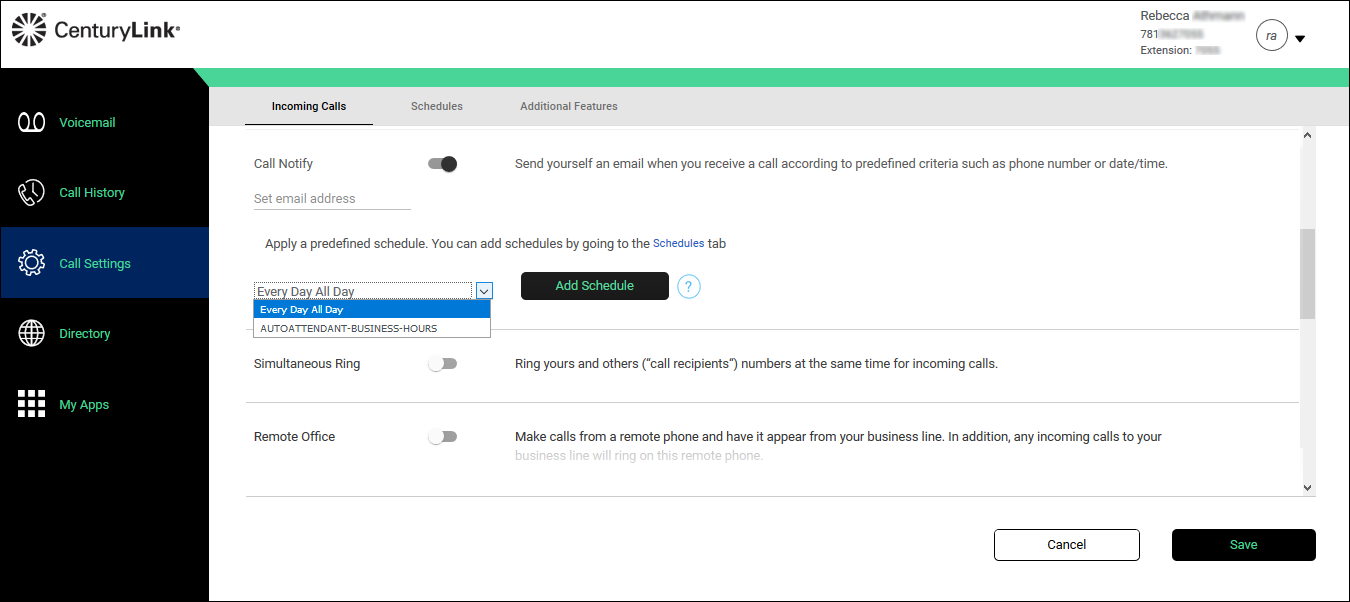
Call Notify sends you an email with the incoming call information.
Call Waiting allows you to receive and answer additional calls while you're on an active call. If it's turned off, new calls will be sent to voicemail.
Do Not Disturb sends calls directly to your voicemail until you turn it off.
Office Anywhere allows you to receive calls on another device, such as a cell phone. You can also move calls between your handset and mobile phone.
Priority Alert gives your phone a distinctive ring when receiving calls from specified numbers. You can define the phone number and date and time of the call you want to be alerted to.
To access calling features from the user portal
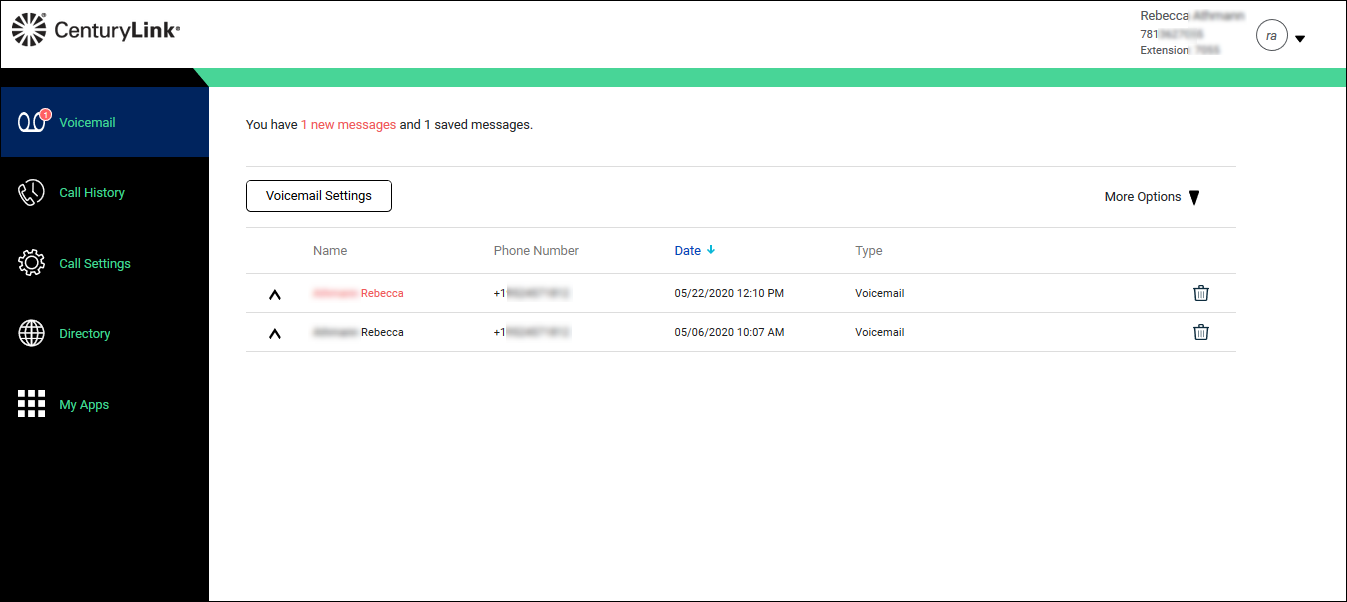
2. Open the Voicemail tab
3. Click Voicemail Settings
- Click the Call Settings tab. The Incoming Calls tab opens.
- Scroll down to find the feature you'd like to turn on or off and change the toggle.
These features have further instructions for set-up:
Call Forwarding
- Select a checkbox for Always, When busy, or When no answer.
- In the Set number field, type the number you’re forwarding to.
- From the Number of rings before forwarding list, select the number of rings you want callers to hear before they are transferred. (We recommend selecting 2-3 rings.)
- Select the Use ring reminder checkbox to hear a short ring when you receive a call, to remind you Call Forwarding is on.
- Click Save.
Note: By default, calls go directly to voicemail if your line is busy or calls are unanswered. Typically, you don’t change these settings, but you can if needed.
Call Notify
- In the Set email address field, type your email address.
- Select Every Day All Day if you want the schedule to apply all day during every day.
- Select AUTOATTENDANT-BUSINESS-HOURS if you want the schedule to apply to the auto attendant during business hours.
- Click Add Schedule.
- In the And section, from the Calls from list, do one of the following:
- Select Any Phone Number if you want all calls to follow the schedule.
- Select Select Phone Numbers if you want certain calls to follow the schedule, then do any of the following:
- Select the Any Private Number checkbox for all private numbers to follow the schedule.
- Select the Any Unavailable Number checkbox for calls without caller ID to follow the schedule.
- In the Set Number field, type individual numbers you want to follow the schedule.
- Select the Any Private Number checkbox for all private numbers to follow the schedule.
- Select Any Phone Number if you want all calls to follow the schedule.
- In the Then section, do one of the following:
- Select the Notify me radio button if you want to be notified.
- Select the Don't notify me radio button if you don’t need to be notified.
- Select the Notify me radio button if you want to be notified.
- Click Save.
Office Anywhere
- If you want all Anywhere devices to ring when you Click-to-Dial from the user portal, select the Alert all enabled “Locations” for Click to Dial checkbox.
- Click Add Another “Location” to add an Anywhere device.
Additional devices can be added by clicking Add Another Location, then do the following (only one device must be defined for the feature to work):
- In the Name field, type a description for the device, such as cell phone.
- In the Phone Number field, type the phone number for the Anywhere device you’re defining.
If you no longer want to send calls to a phone number, click Delete.
- In the Name field, type a description for the device, such as cell phone.
- Click Save.
Priority Alert
- Select Every Day All Day if you want the schedule to apply all day during every day.
OR
Select AUTOATTENDANT-BUSINESS-HOURS if you want the schedule to apply to the auto attendant during business hours.
- Click Add Schedule.
- In the And section, from the Calls from list, do one of the following:
- Select Any Phone Number if you want all calls to follow the schedule.
- Select Select Phone Numbers if you want certain calls to follow the schedule, then do any of the following:
- Select the Any Private Number checkbox for all private numbers to follow the schedule.
- Select the Any Unavailable Number checkbox for calls without caller ID to follow the schedule.
- In the Set Number field, type individual numbers you want to follow the schedule.
- Select the Any Private Number checkbox for all private numbers to follow the schedule.
- Select Any Phone Number if you want all calls to follow the schedule.
- In the Then section, do one of the following:
- Select the Notify me radio button if you want to be notified.
- Select the Don't notify me radio button if you don’t need to be notified.
- Select the Notify me radio button if you want to be notified.
- Click Save.
Was this information helpful?
About Lumen | About CenturyLink | Careers | Investor Relations | Newsroom | Legal | Privacy Notice | Tariffs | Customers with Disabilities | Site Map | Cookie Settings | CenturyLink in Your Area | CenturyLink.net | Quantum Fiber in Your Area | White/Yellow Pages | Centurylink Retailer
Residential | Small Business | Enterprise | ©2024 CenturyLink. All Rights Reserved.