We no longer support this browser. For an optimal experience, we recommend updating your browser.
How to update your mailing address
In some cases, your billing address may be different from your service address. Make sure to keep it updated so that you receive important account notices from CenturyLink.
You can update your mailing address on the My CenturyLink website or in the app.
How to edit your address in My CenturyLink
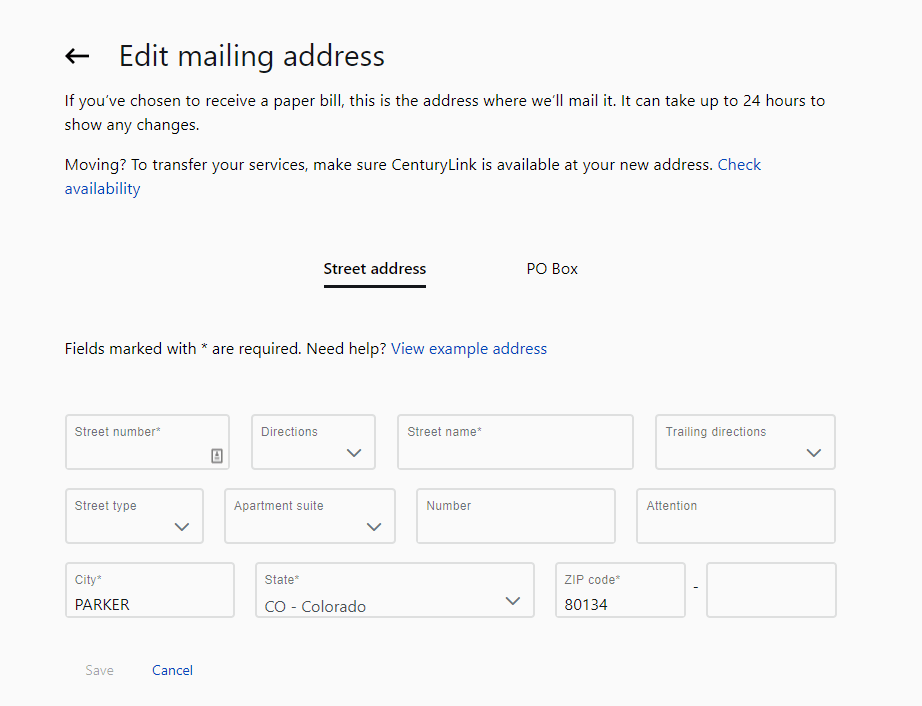
You can update your mailing address in My CenturyLink. (This link will take you straight to the page after you sign in to your account.)
Example image only
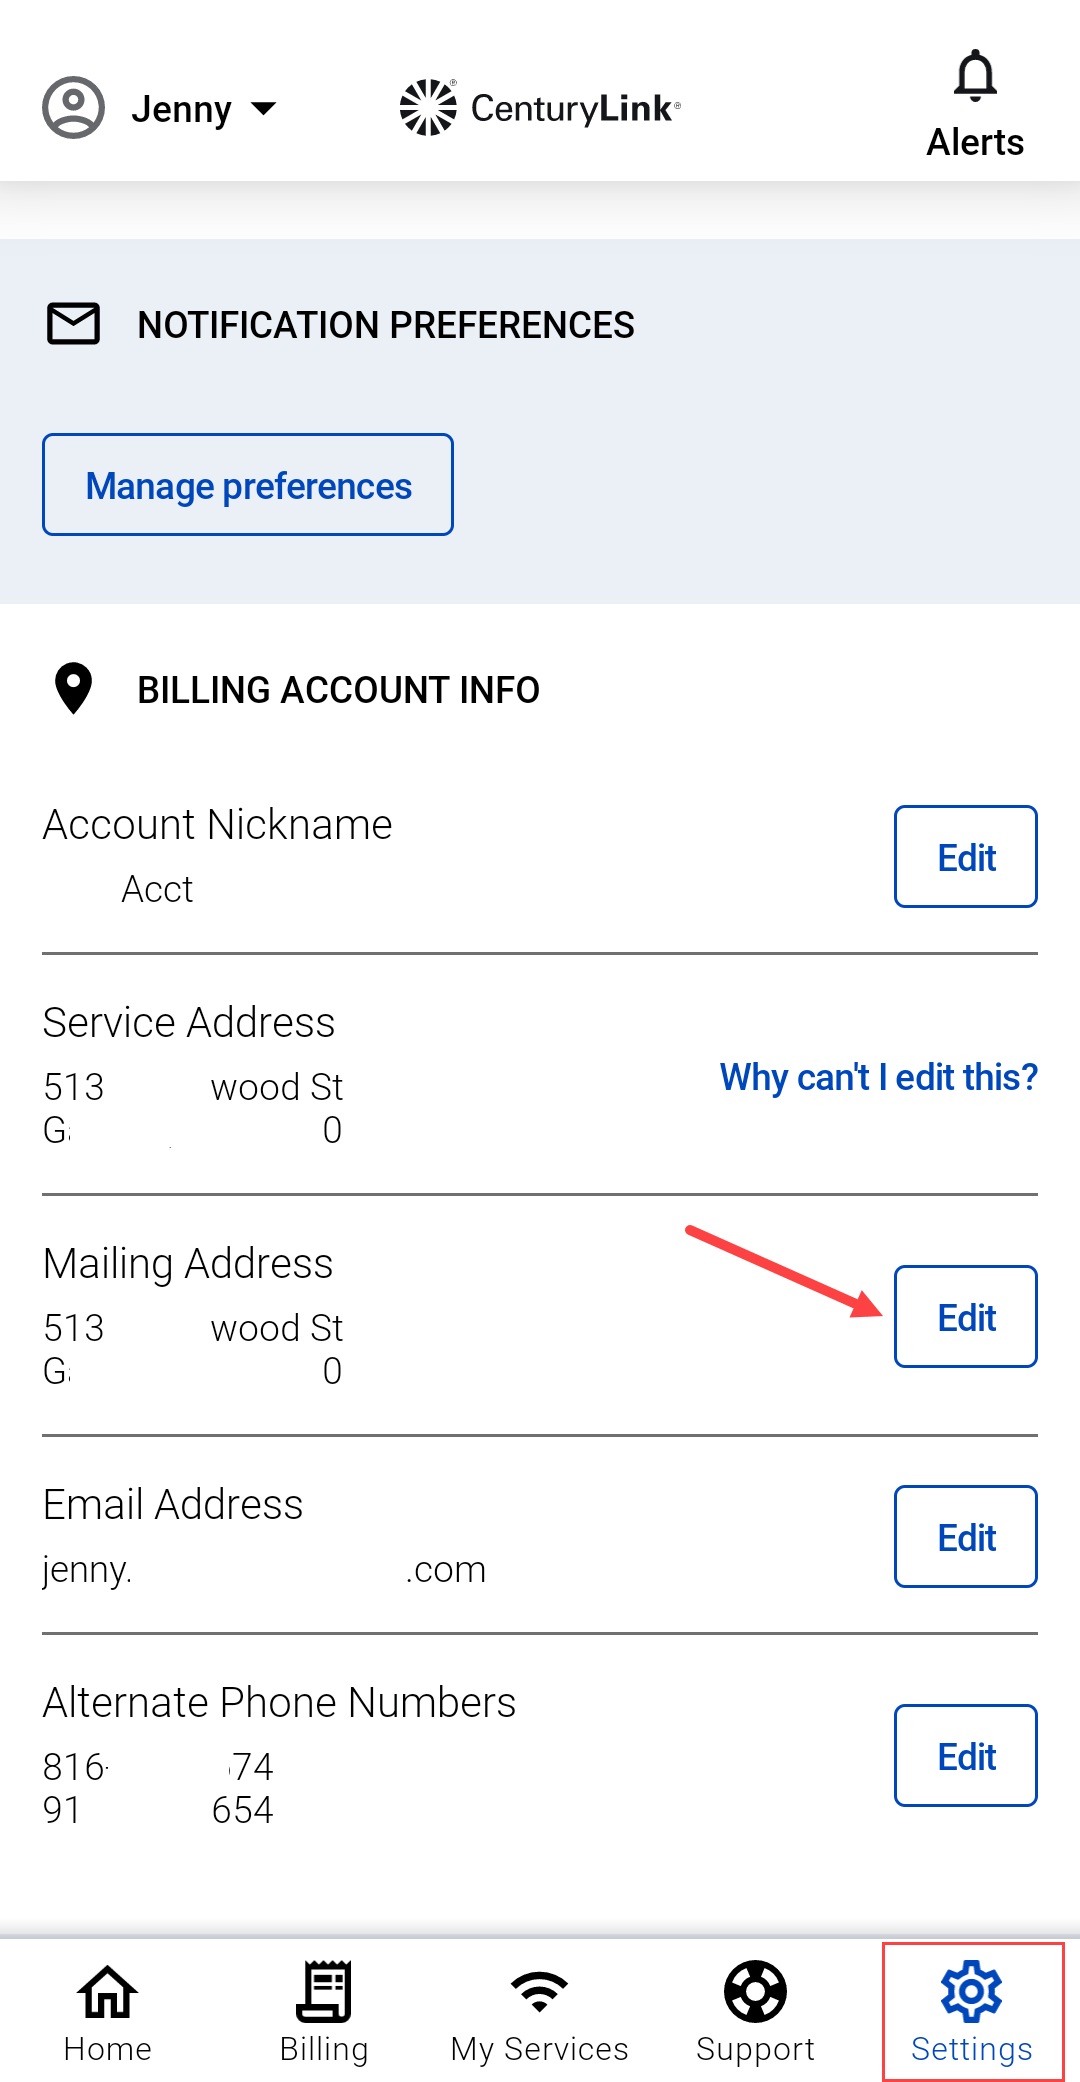
You can also get to your mailing address from Settings, then select Account Info.
Example image only

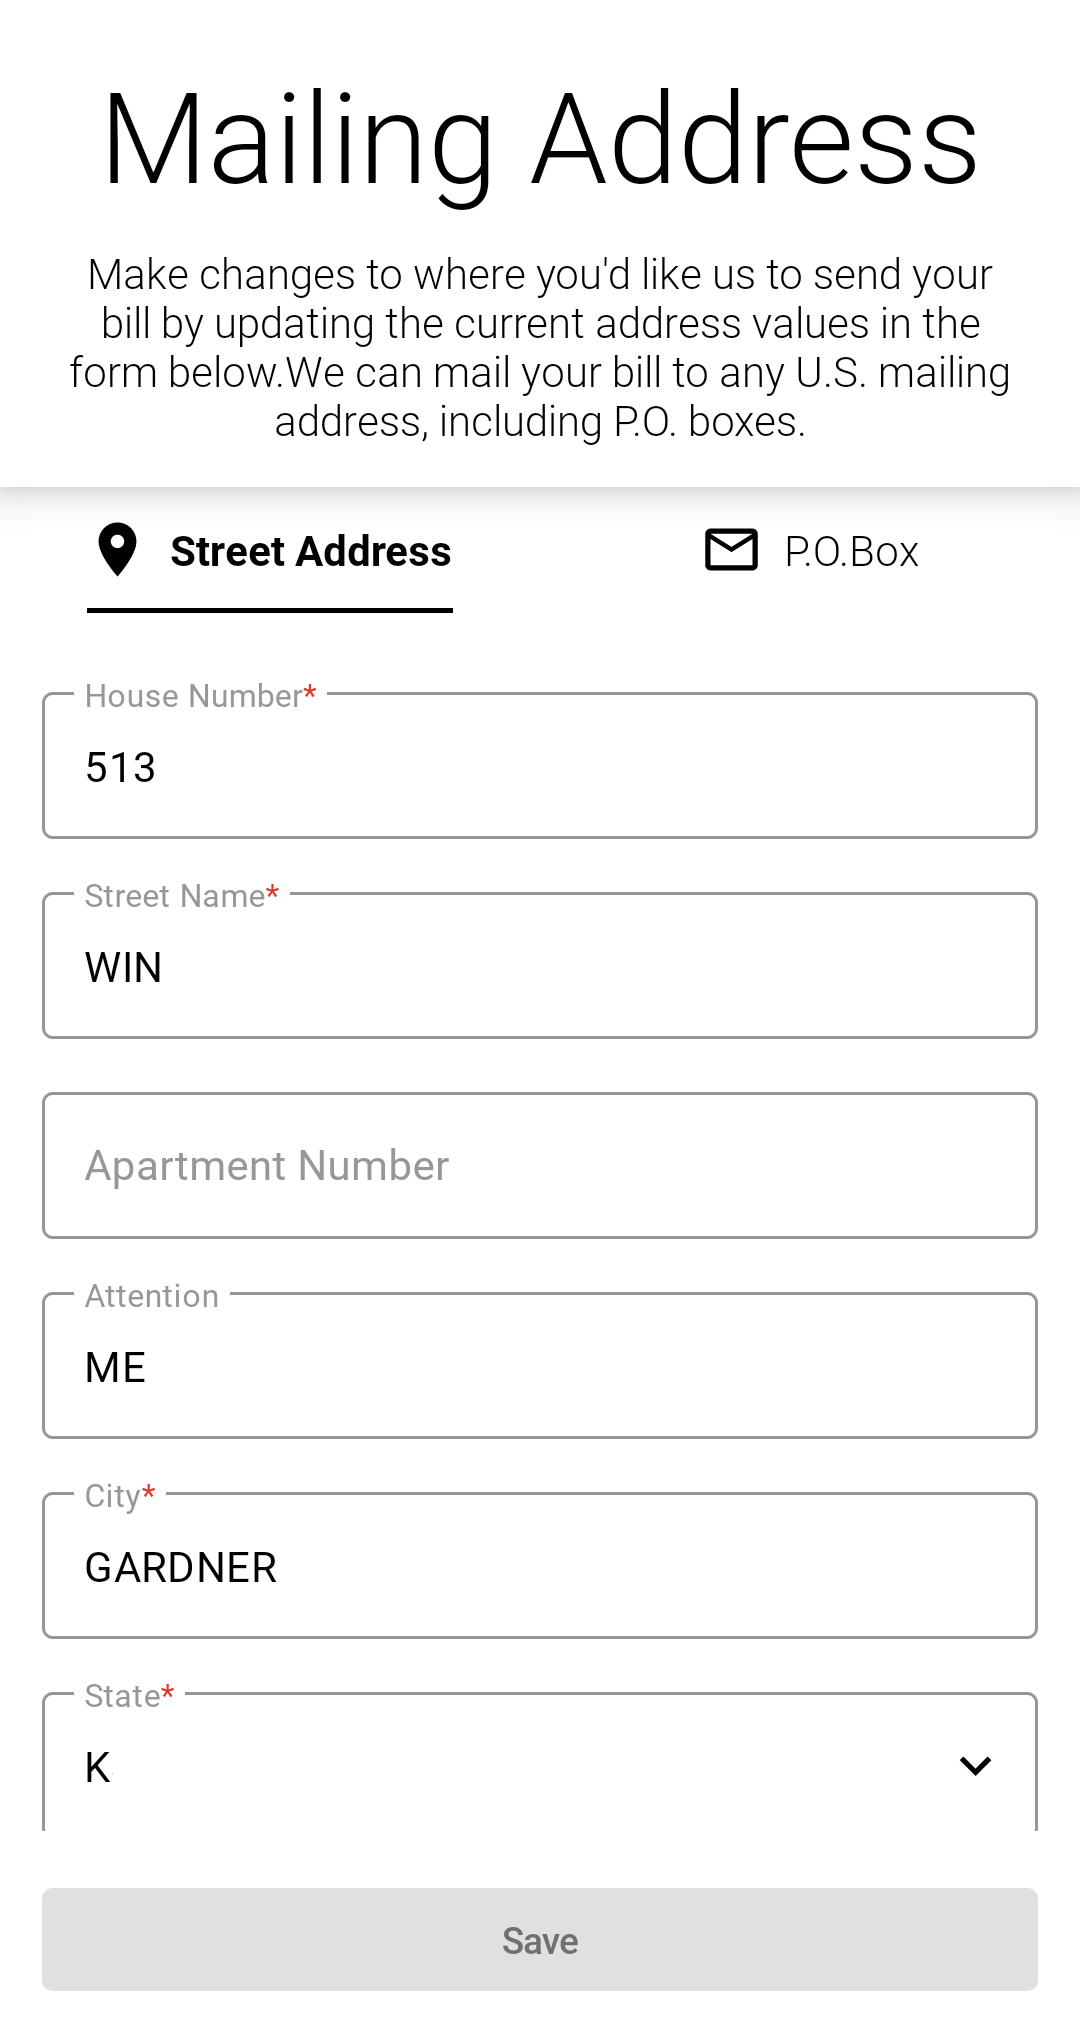
How to edit your address in the app
- Sign in to the CenturyLink app.
- Go to Settings.
- Scroll down to Billing Account Info.
- Click "Edit" next to Mailing Address.
- Enter the updated mailing address and select "Save."
Why is there a mailing address for my account?
Most of the time, your service address and mailing address are the same.
Sometimes, however, you may need to receive your bill and important notices at a different address. For instance, one of these situations may apply:
- You are responsible for the accounts of a family member living separately.
- You manage more than one property.
- You prefer to recieve your bills at a work address.
In all these examples, having the correct billing address on file is critical to ensure that we can communicate with you.
If you are moving and need to update your service address, or if your billing and service addresses are different, please chat with us.
Do you prefer email?
If you want to reduce the number of paper mailings you get from us, you can request email or text notifications and paperless billing.
Please note that some regulatory notices and account security changes must, by law, be sent by mail. So, even if you are signed up for email or text notifications, it's important to make sure we have the correct postal address to send sensitive or legal notices.
Pay and manage your account
Use the CenturyLink app to manage your account and network.


Browse news, entertainment, weather, and more.
Was this information helpful?
Support topics
About Lumen | About CenturyLink | Careers | Investor Relations | Newsroom | Legal | Privacy Notice | Tariffs | Customers with Disabilities | Site Map | Cookie Settings | CenturyLink in Your Area | CenturyLink.net | White/Yellow Pages | Centurylink Retailer
Residential | Small Business | Enterprise | ©2026 CenturyLink. All Rights Reserved.