We no longer support this browser. For an optimal experience, we recommend updating your browser.
Setting up your Premium WiFi network
For CenturyLink® Fiber Internet service connected with this equipment:
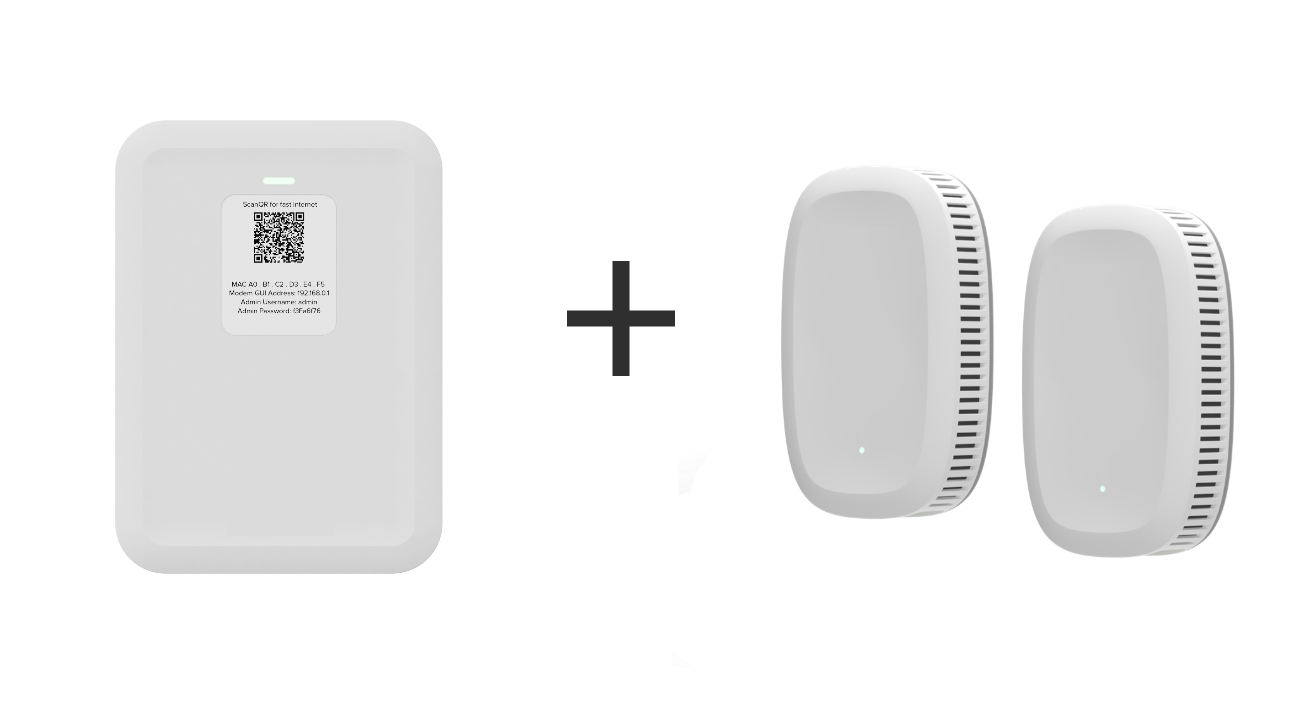
Premium WiFi is a distributed wireless system for fiber internet customers. It replaces a traditional router or gateway. If you have an attached SmartNID plus WiFi pods, this page is for you! Follow the steps in the app (shown below) to set up your network and get connected.
Download the HomePass app
Download the HomePass by Plume app* to manage Premium WiFi.


* The HomePass by Plume app is separate from the My CenturyLink app.
Premium WiFi setup step-by-step
Use these step-by-step instructions to follow along with the HomePass app setup.
Sign in to the HomePass app
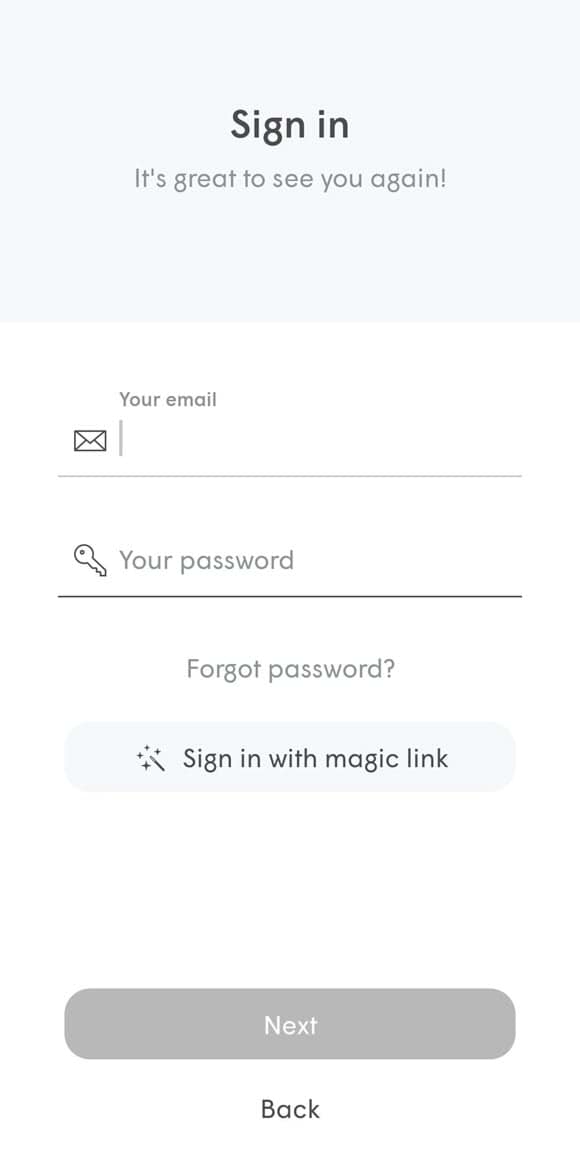
Once the app is installed, select Sign In. Enter the email address you provided either to the technician during installation or at the time you ordered CenturyLink Fiber Internet service. From there you have two choices:
- Tap Forgot password? and use the link emailed to you to set an account password. This is the best option to use if you want to easily sign in to the app more than once.
- Tap Sign in with magic link and click on the link emailed to you to sign in automatically. This option allows you to sign in without a password, but you will need to use the magic link option each time you sign in.
Note: If you see "New Setup," do not select this option. Your account (not your WiFi, just your account) has already been set up for you.
Special note for iPhone users: If you purchased your iPhone outside the U.S., the HomePass app may not appear in the app store. If this happens, simply change your region to the United States in the iPhone settings, and the app will be available. Once you have installed the app, you can adjust the region setting again as needed.
Connect the first pod to the modem (SmartNID)
Did a technician already install your pods? You can skip to setting up your WiFi network.
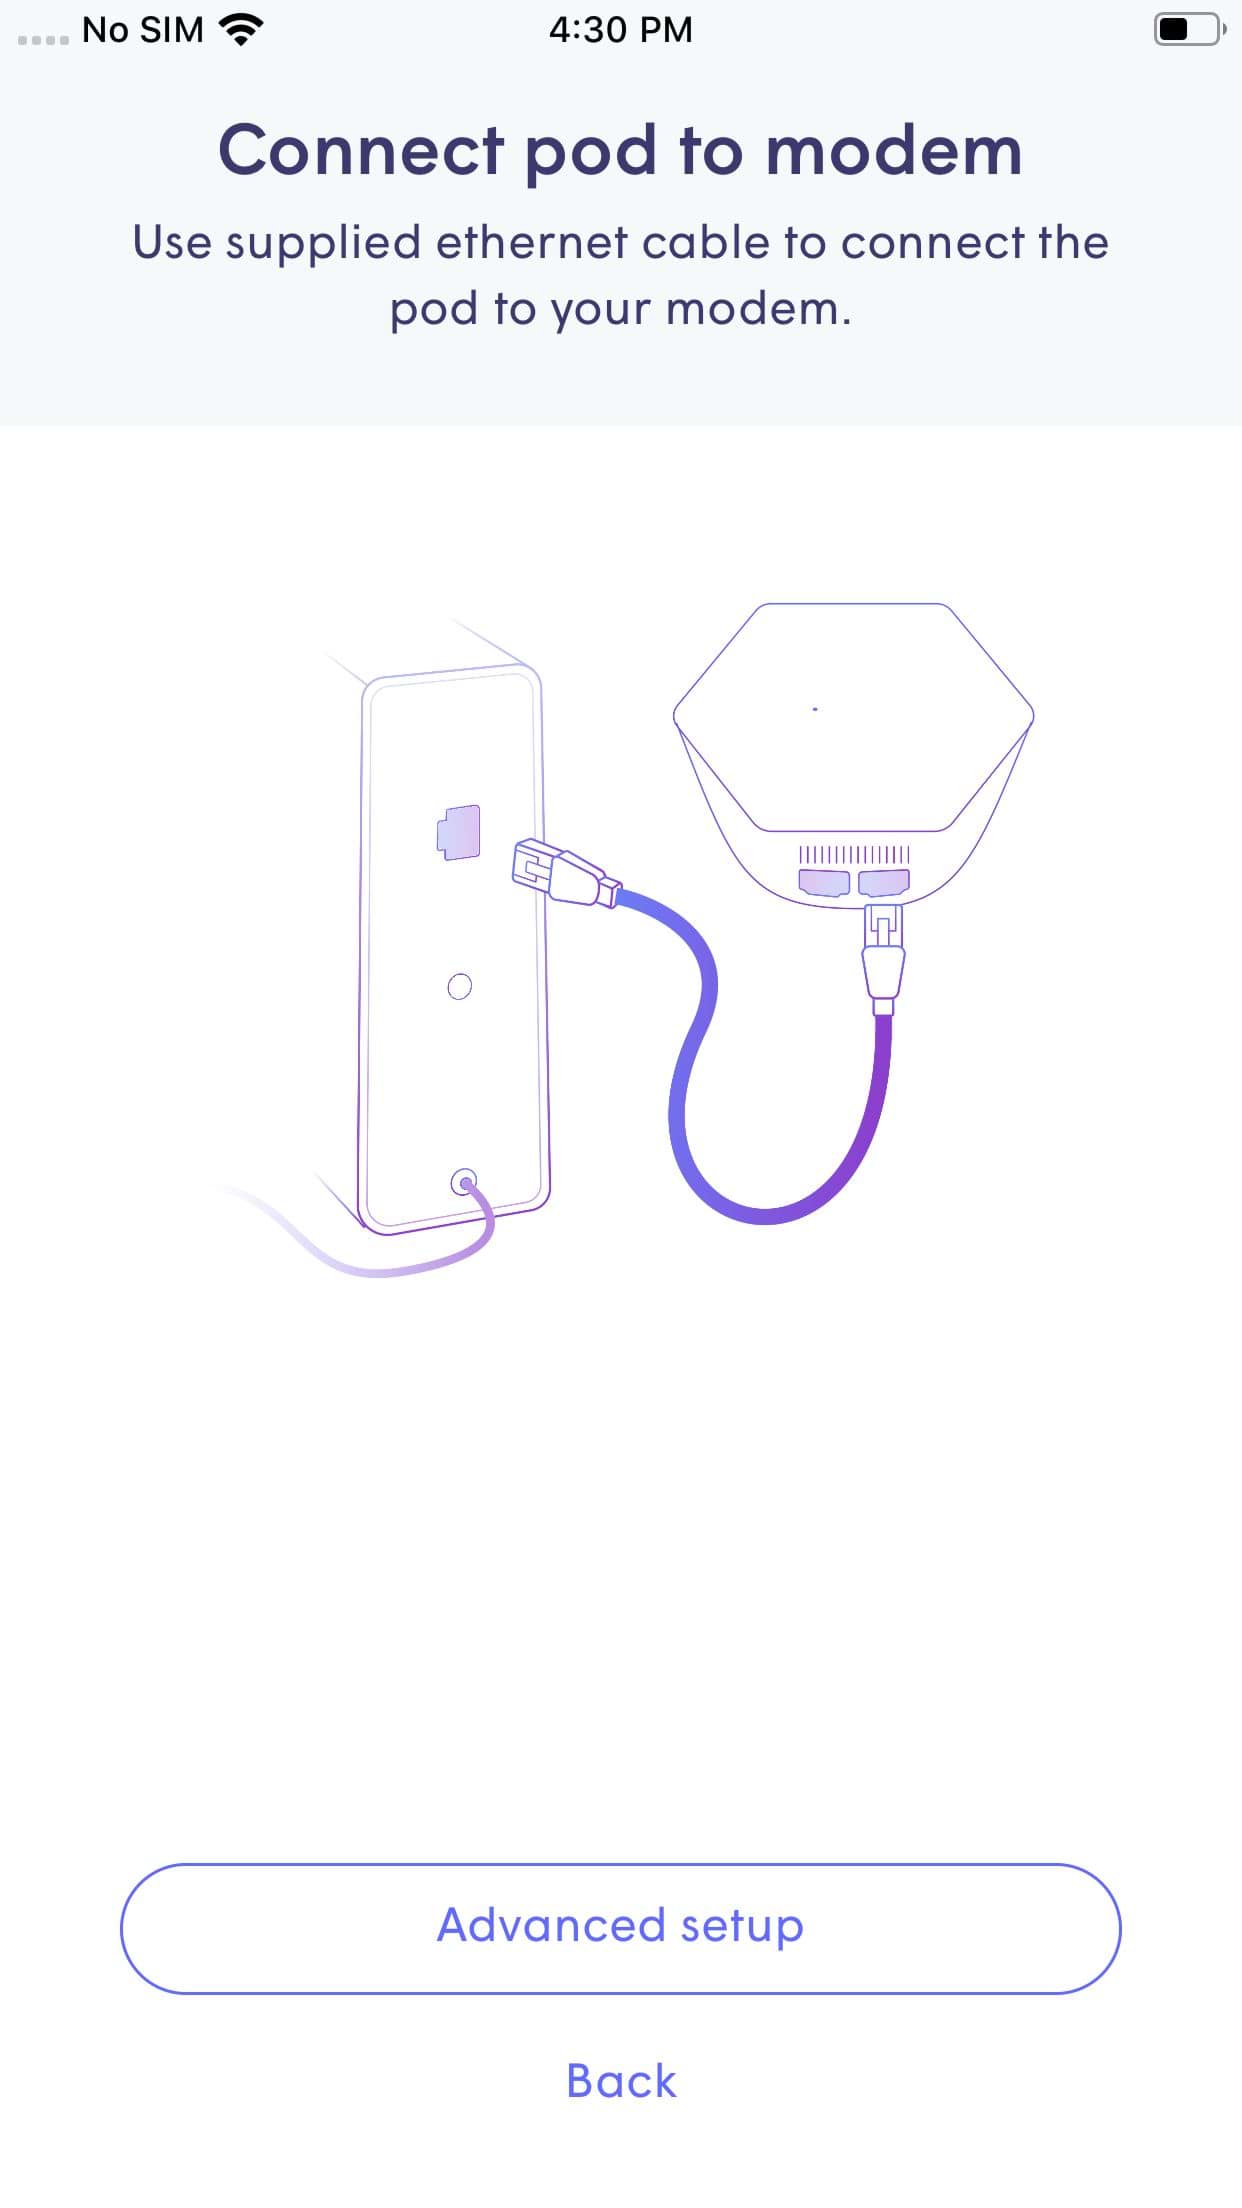
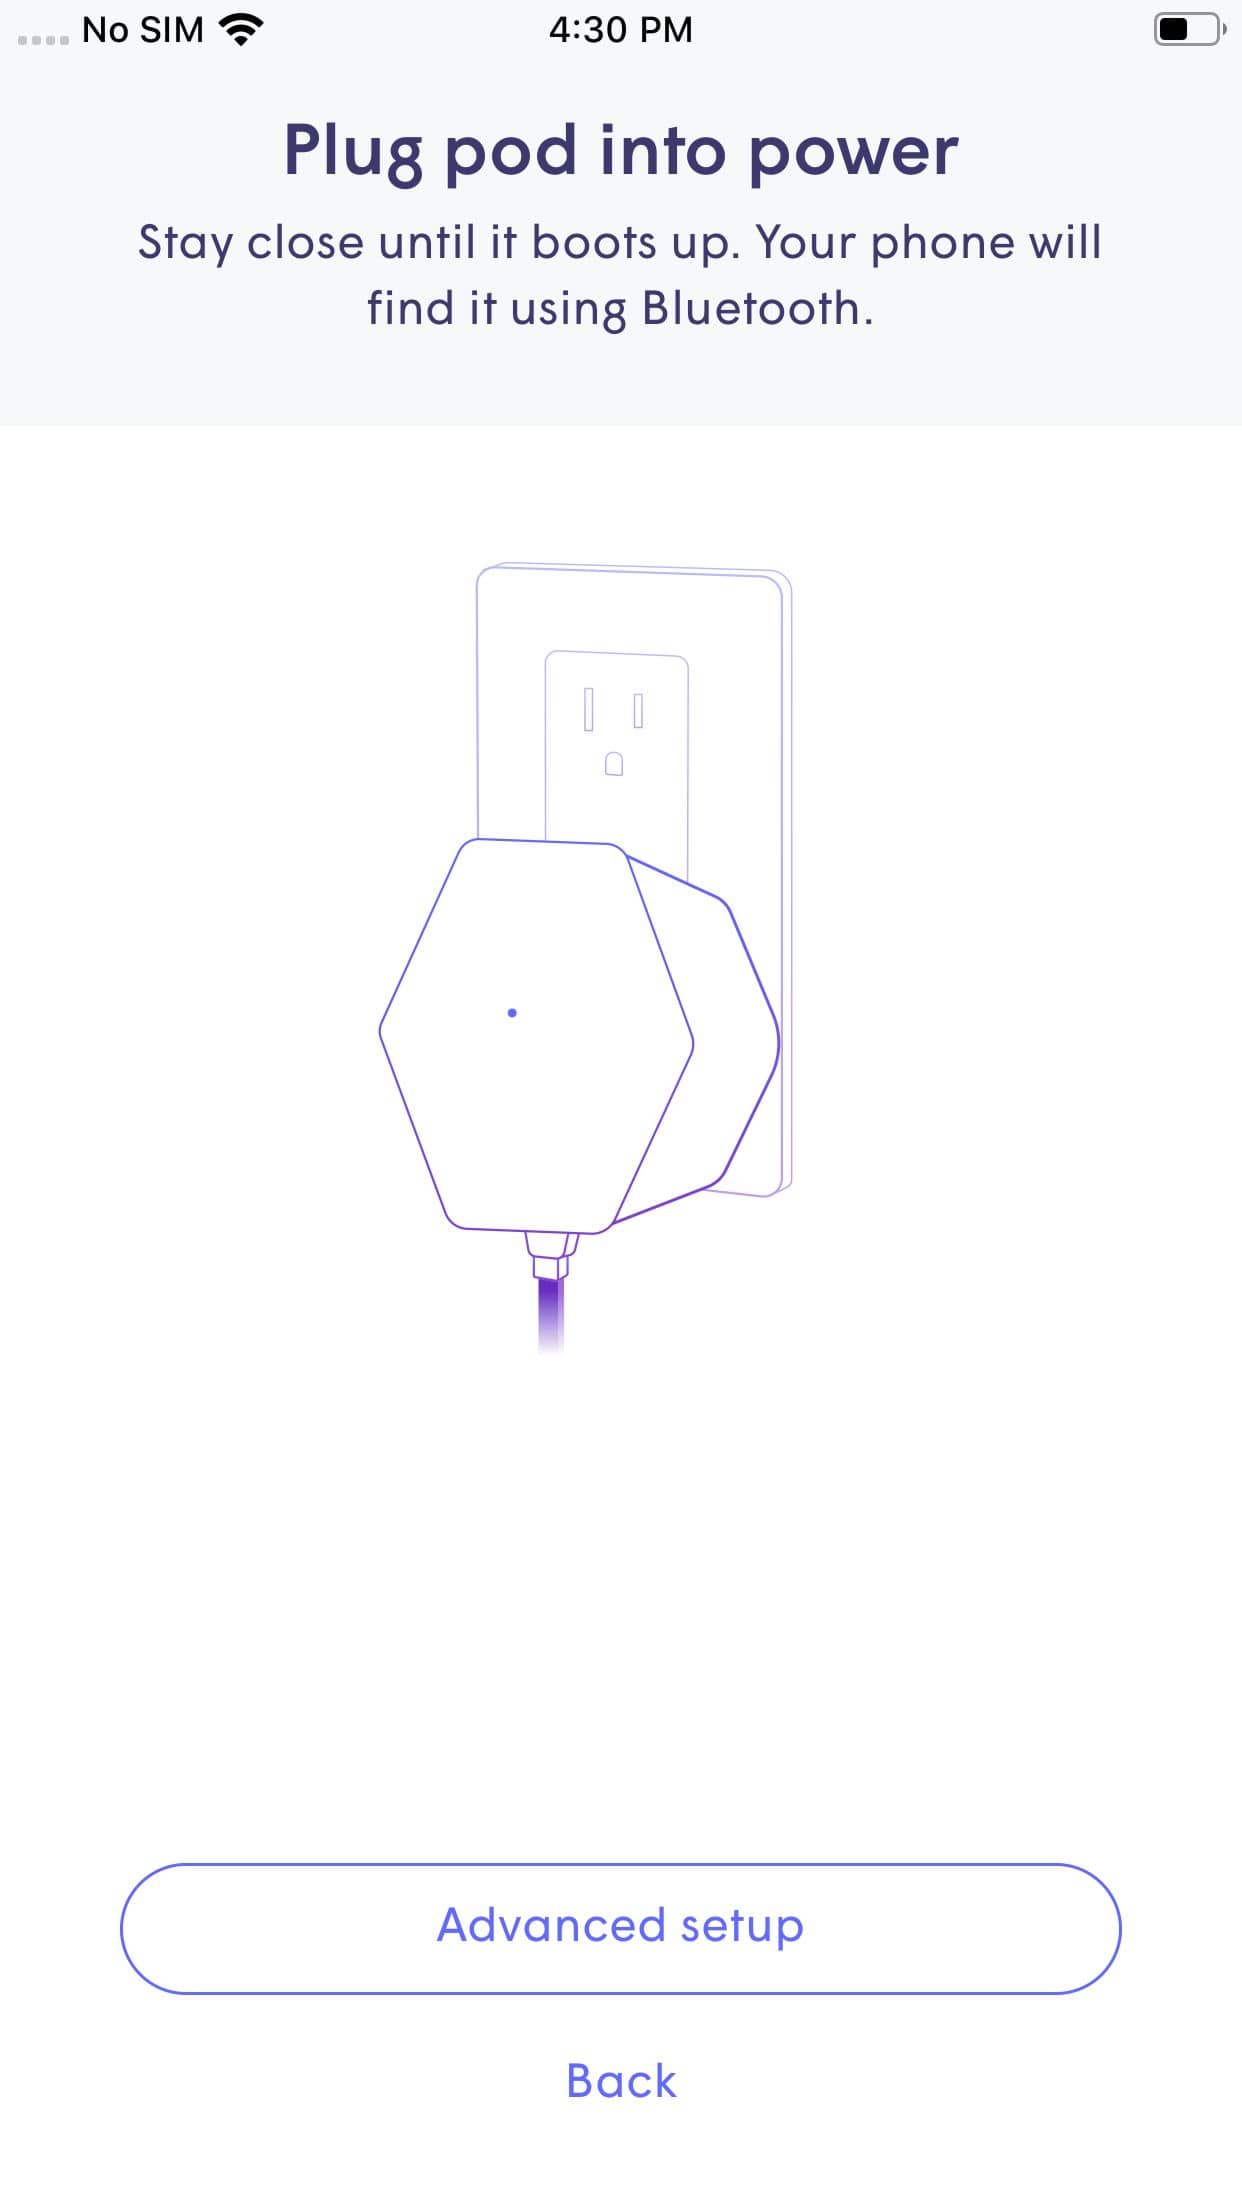
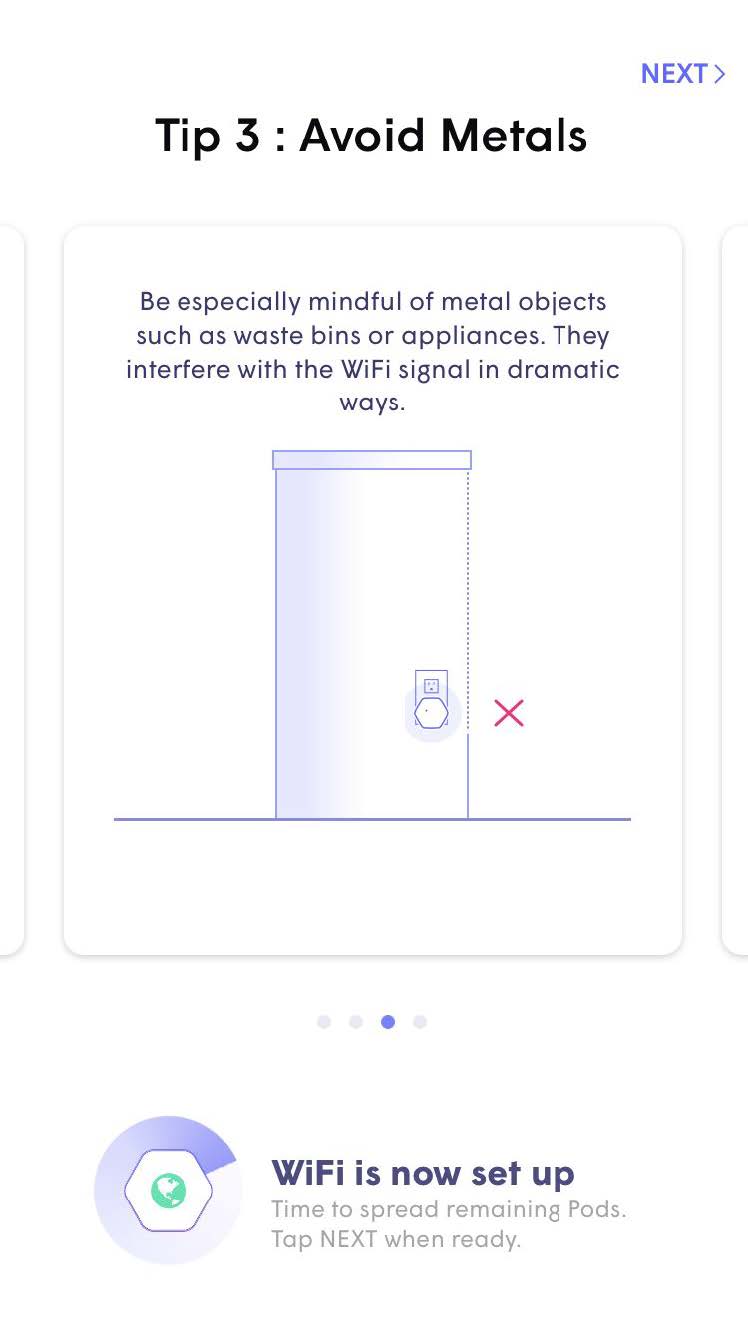
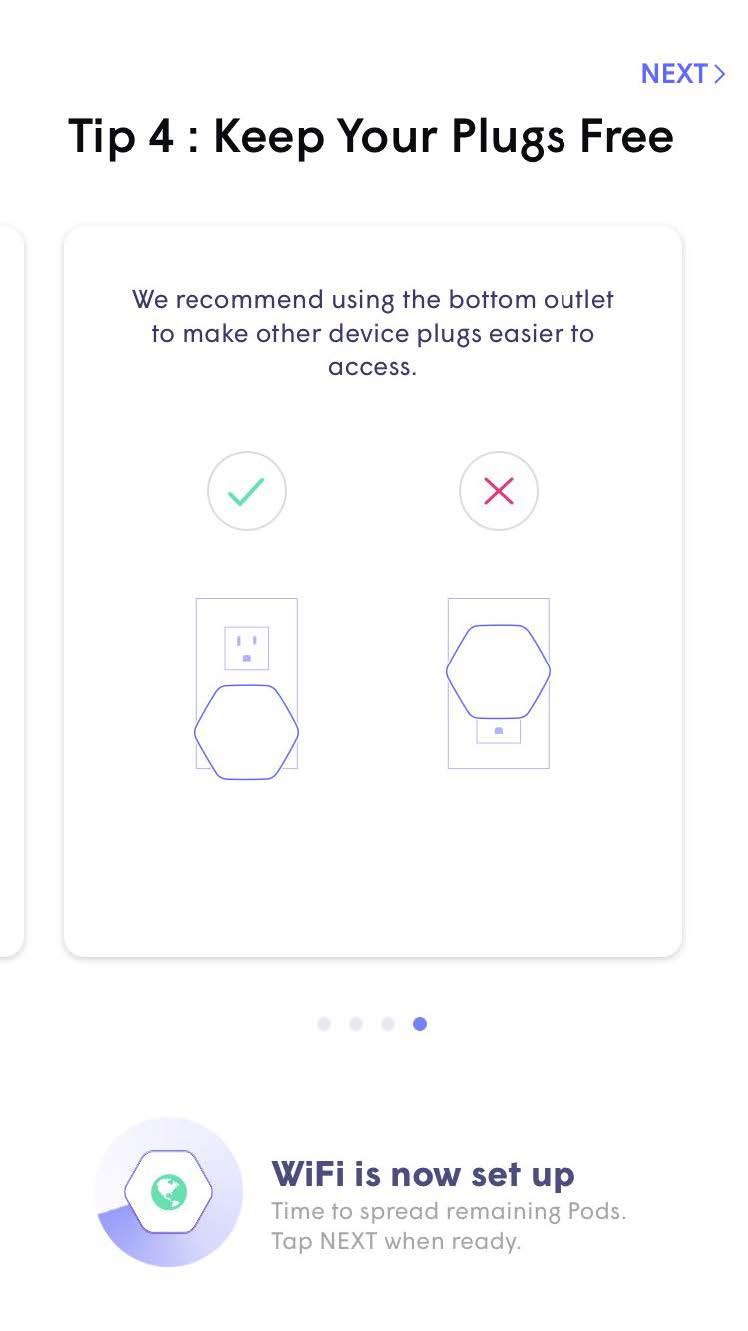
1. Plug one WiFi pod into your SmartNID (the app calls it the "modem") using the Ethernet cable provided. To do this, click one end of the cable into the LAN2 port on the SmartNID; click the other end into a WAN port on the pod. Then plug the power cord into a working outlet.
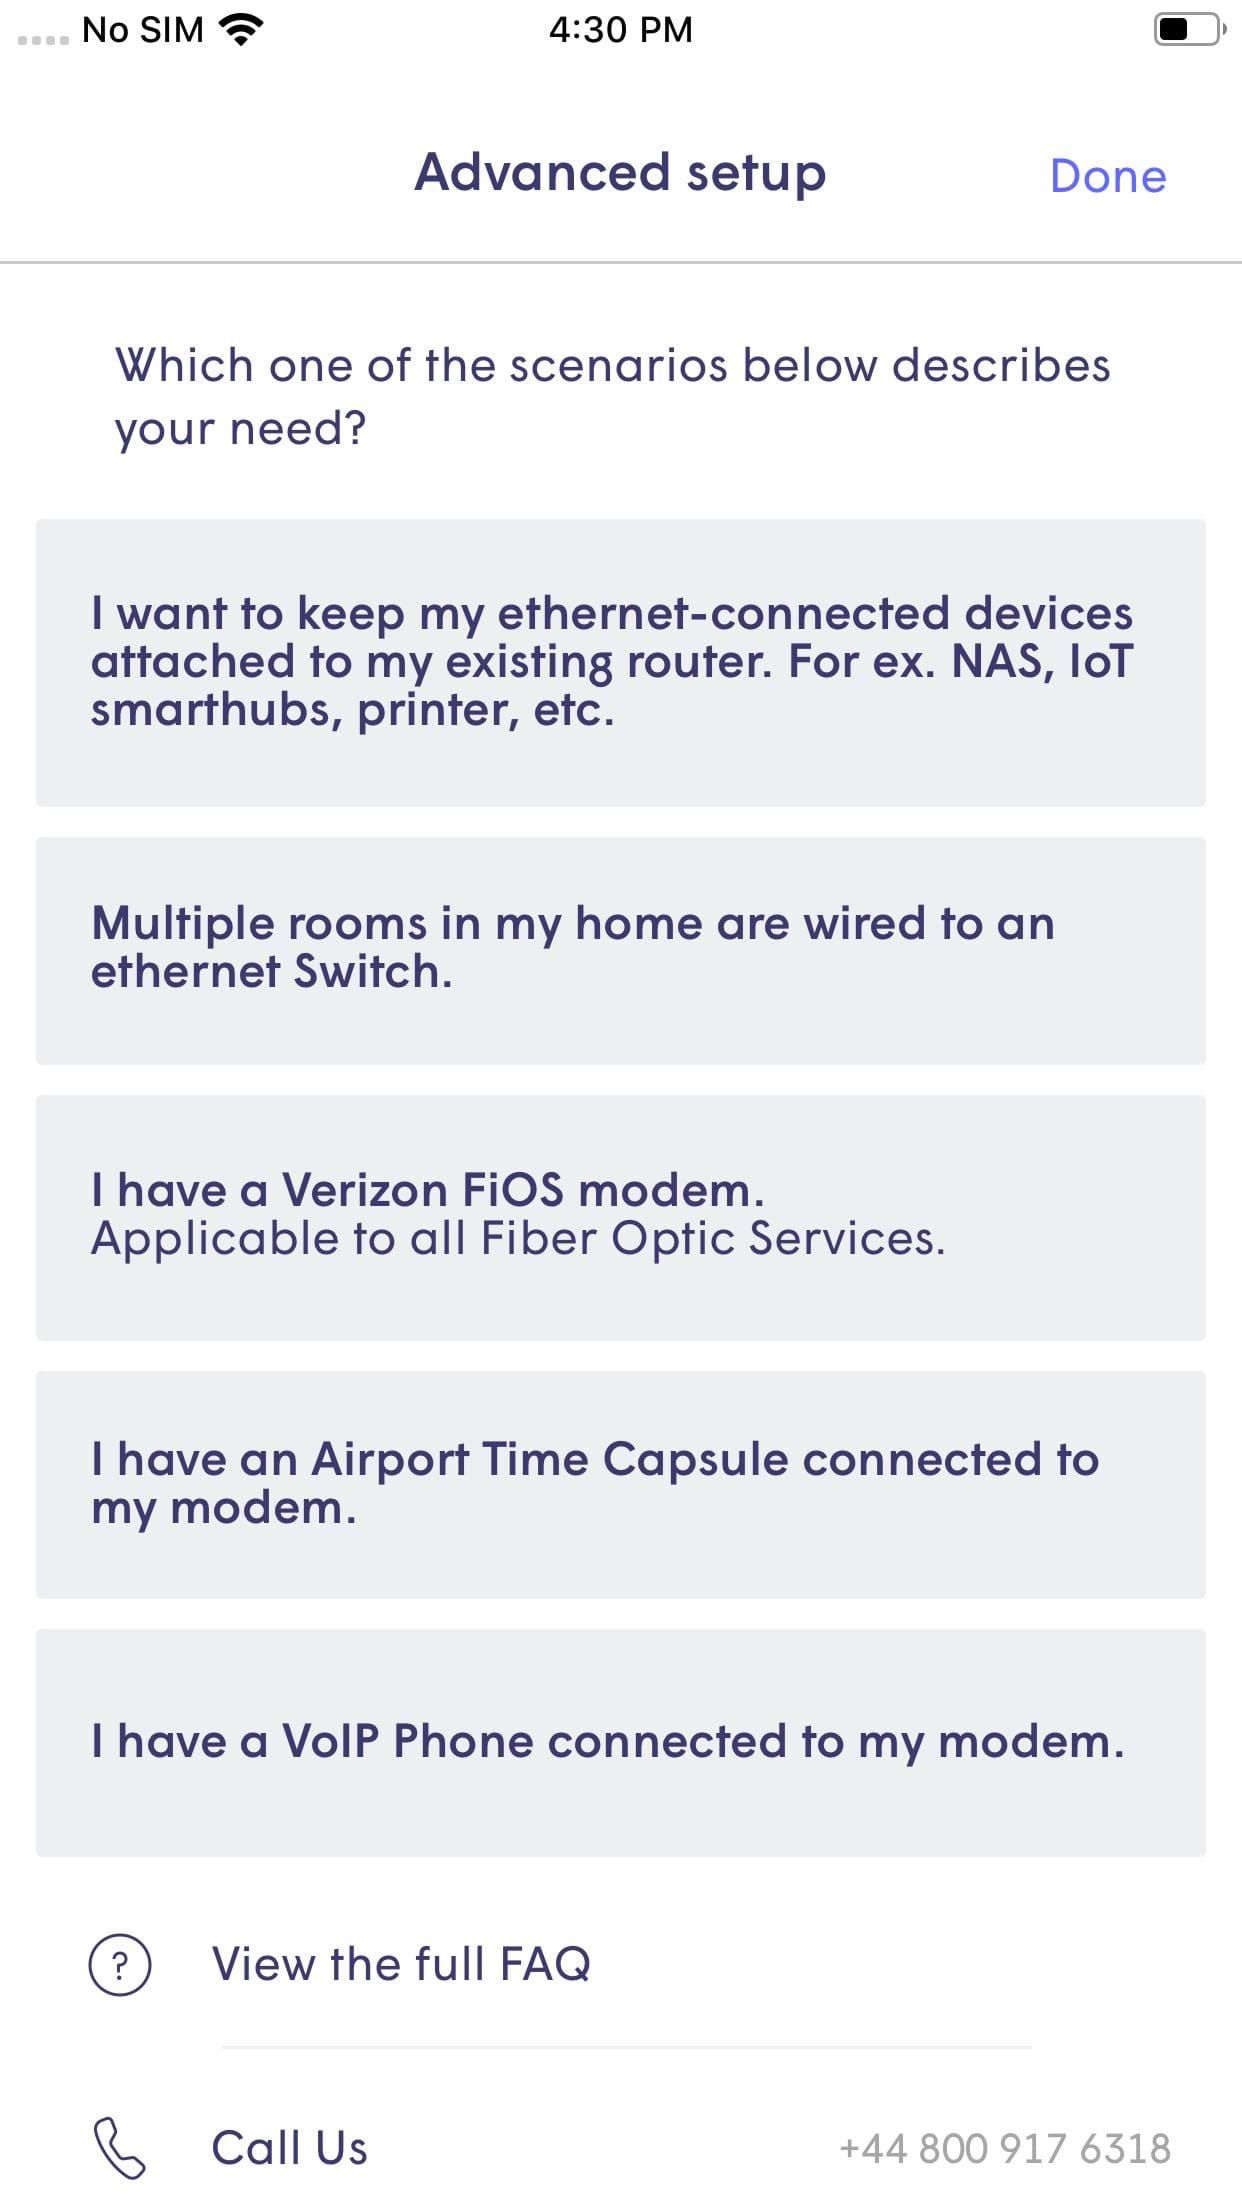
Note: Tap on Advanced Setup in the app to see further instructions if:
- You have a VoIP/digital phone connected to your SmartNID
- You have multiple rooms wired to an Ethernet switch
- You have smart devices connected to your SmartNID
2. Use the app to scan the QR code labeled "Mac Addr" on the bottom or side of the pod. Or, to connect without using the QR code, turn on your phone’s Bluetooth and stay close while the app syncs to the pod.
3. The status light on the pod will slowly pulse green until it connects to the SmartNID and the app.
4. The primary pod that you've connected to your SmartNID will now appear as the "Gateway" in your HomePass app.
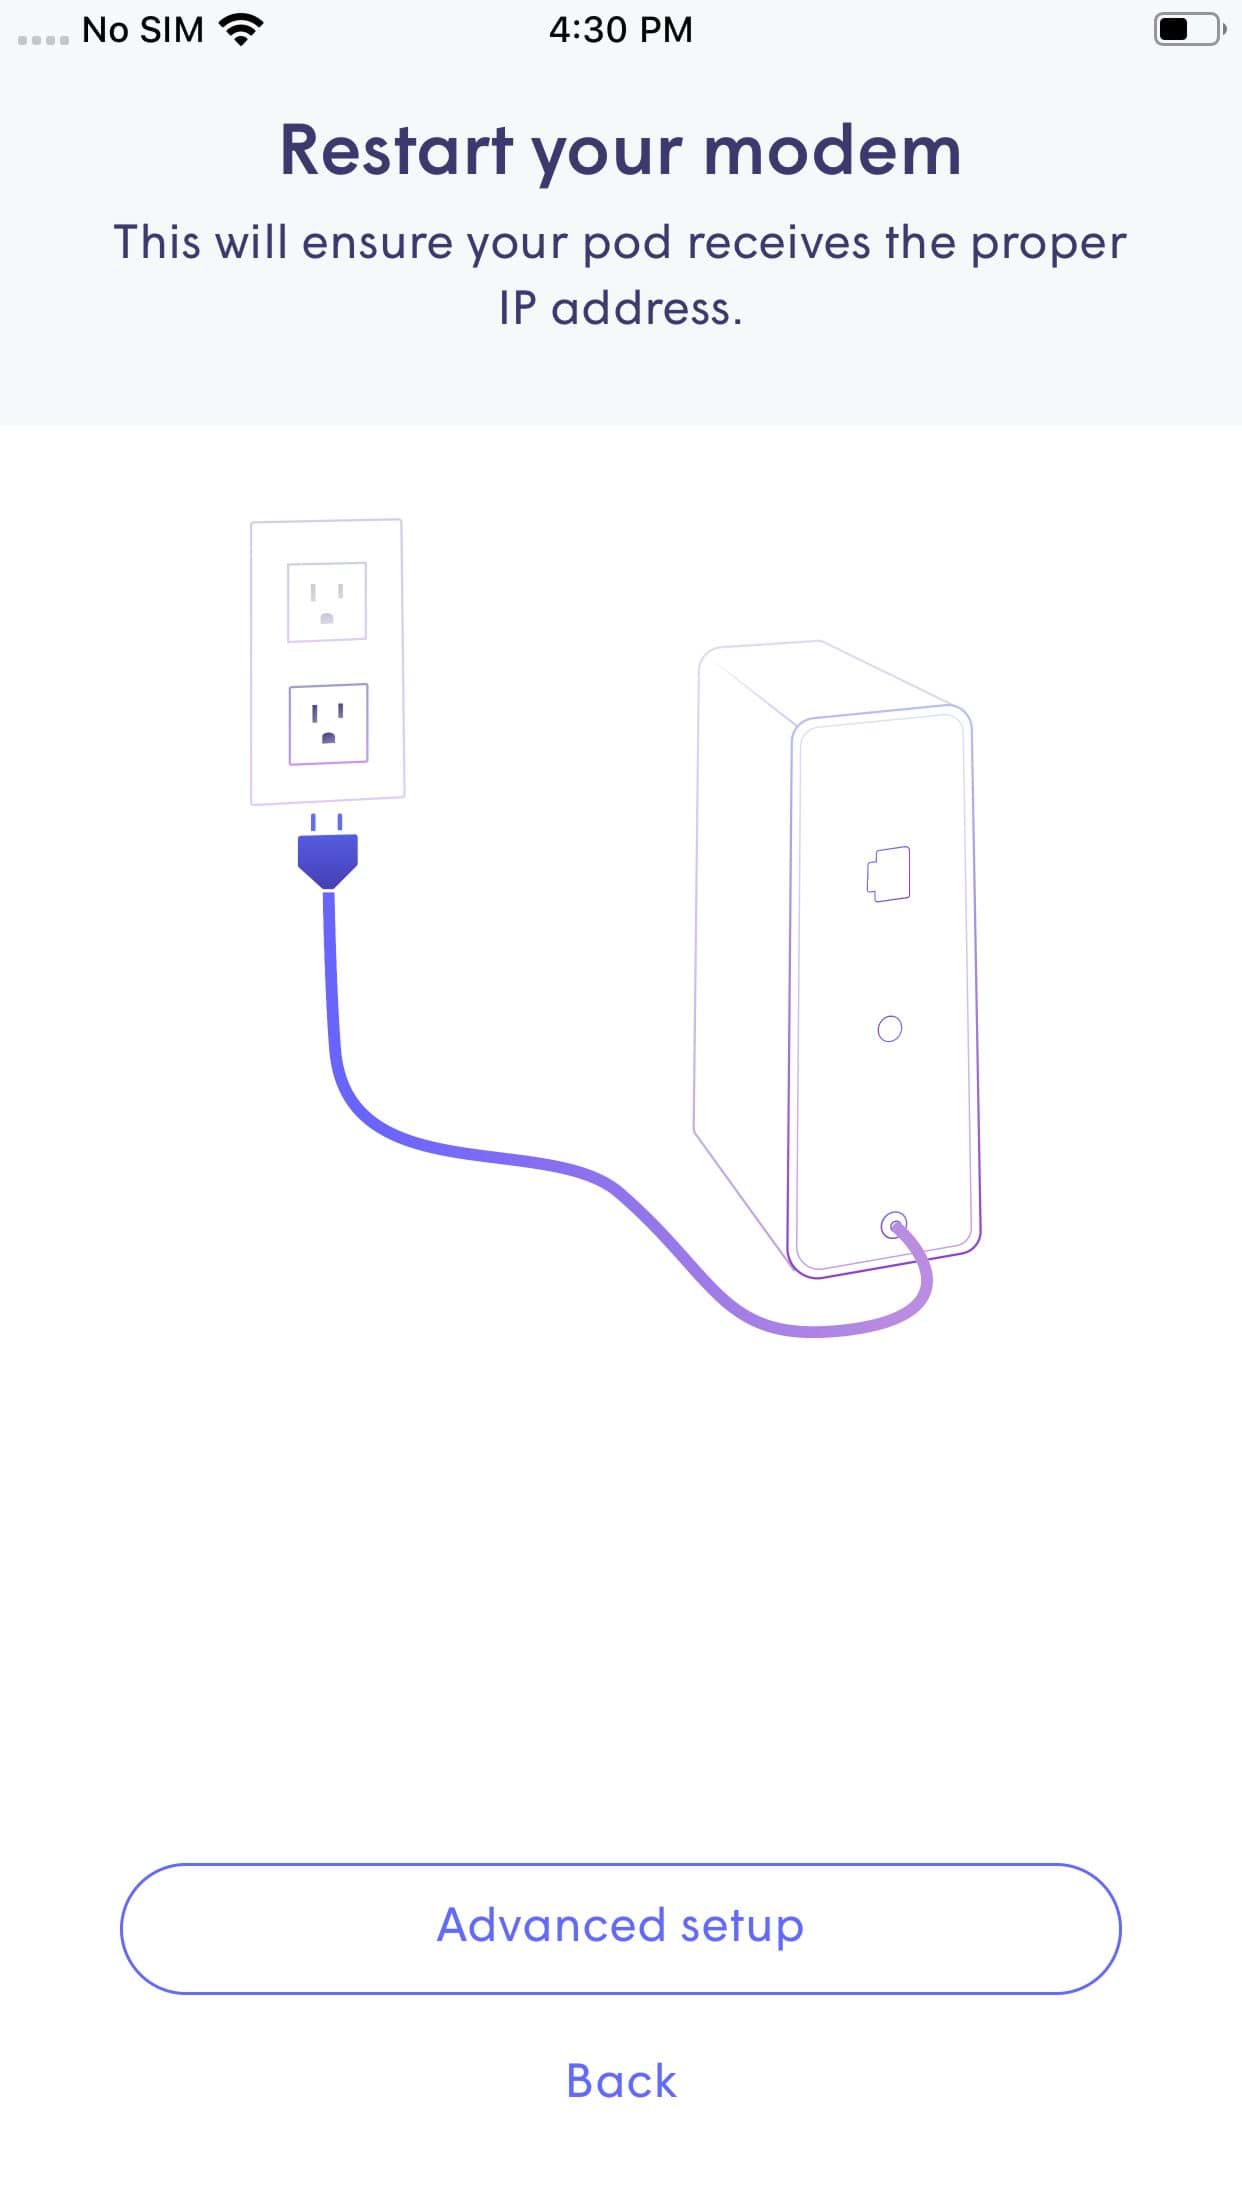
If you have any trouble activating the first pod, try this: Disconnect any other devices that may be plugged into your SmartNID. Then unplug the power cord, wait for 30 seconds, and plug it back in. Wait a few minutes for it to boot up before trying the pod connection again.
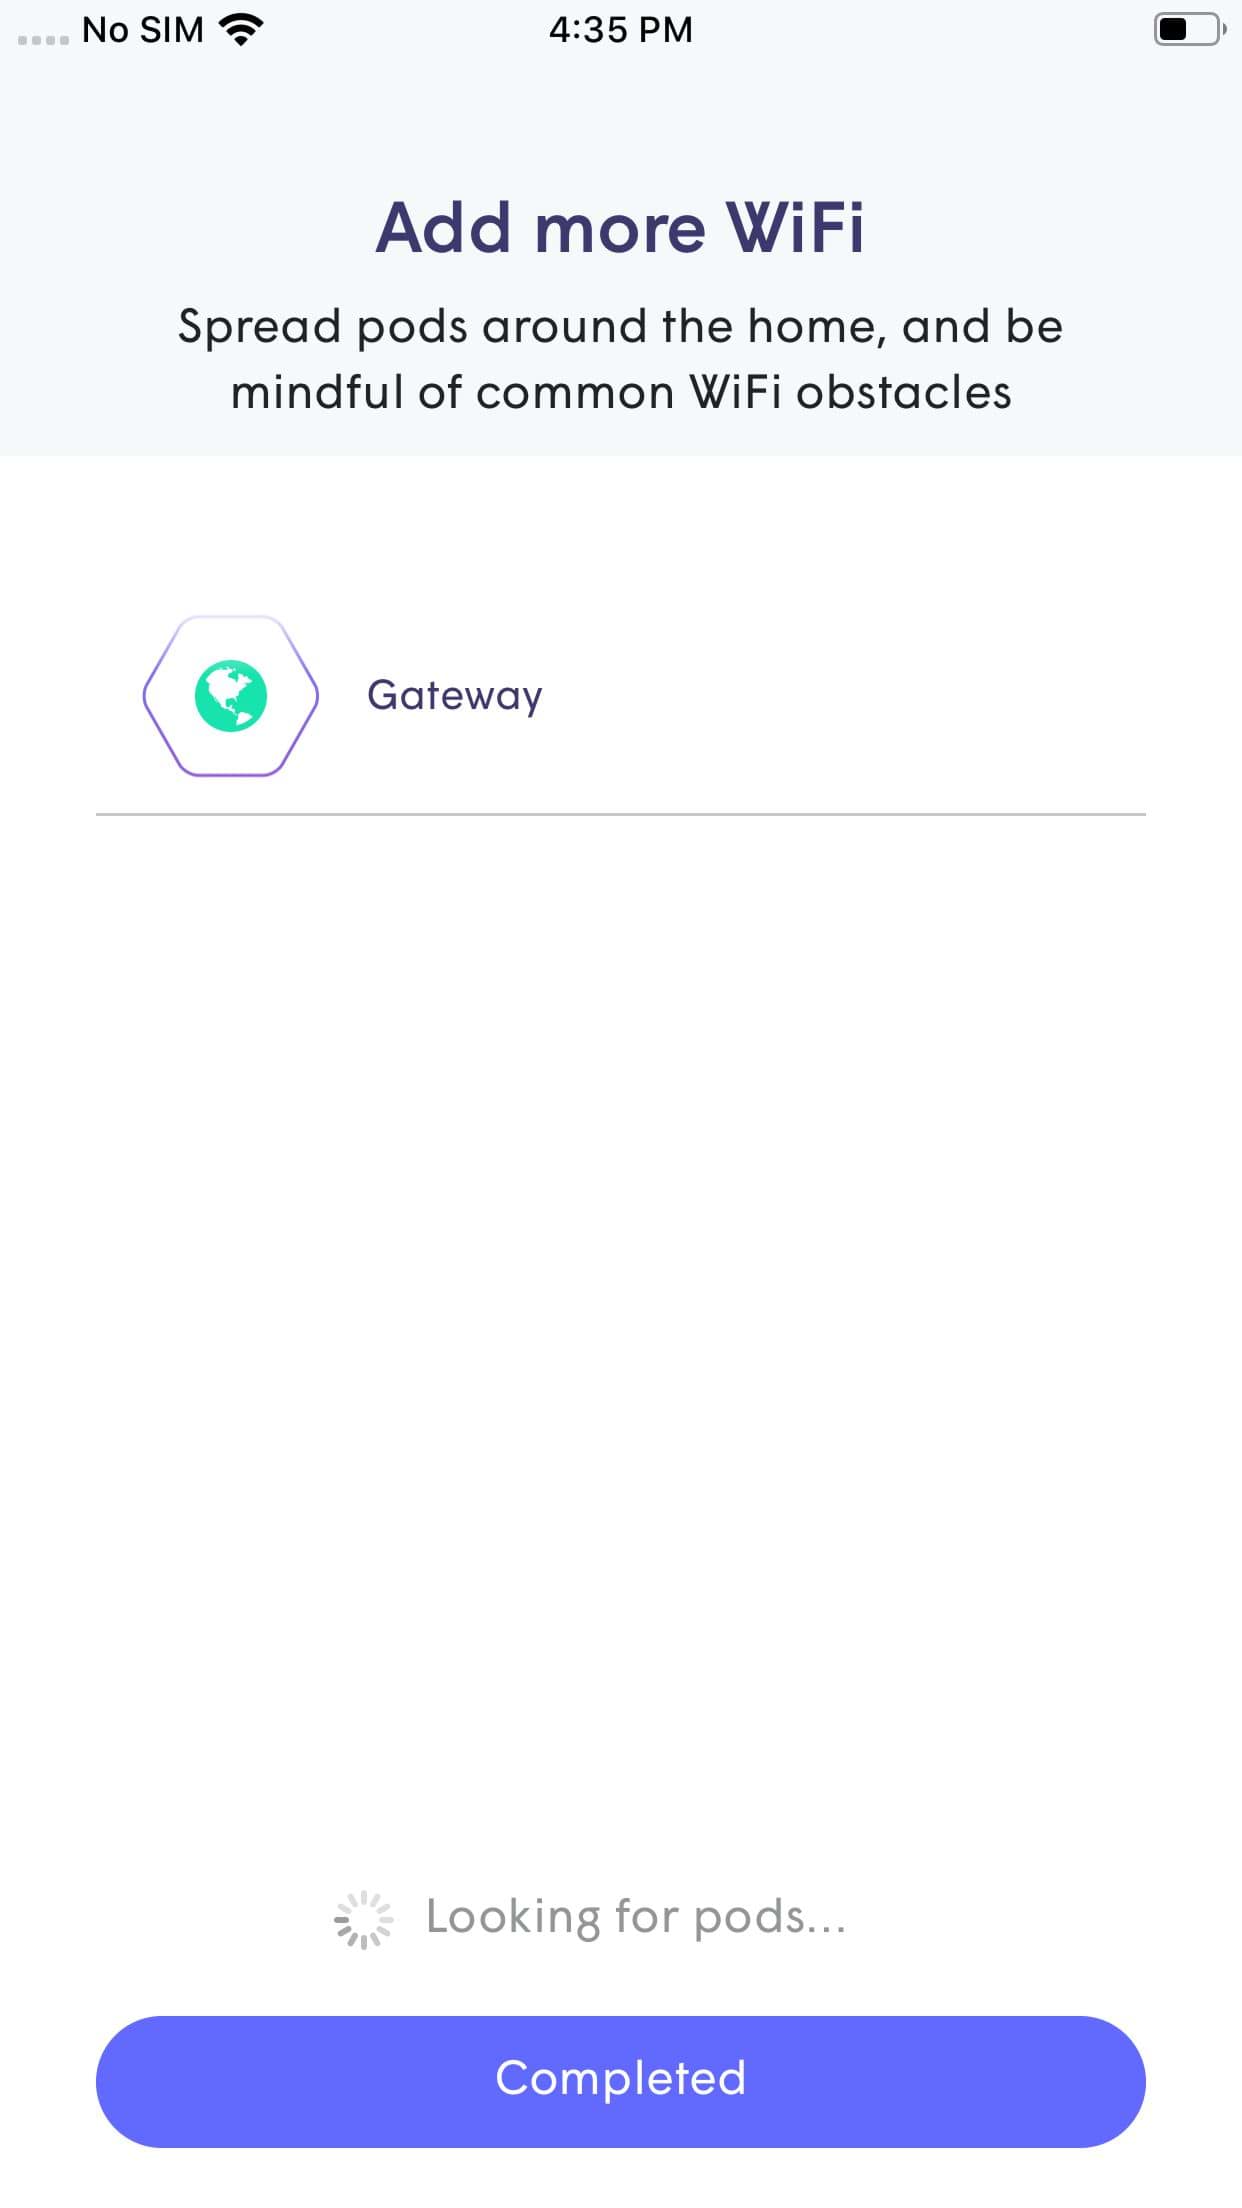
Create your WiFi network
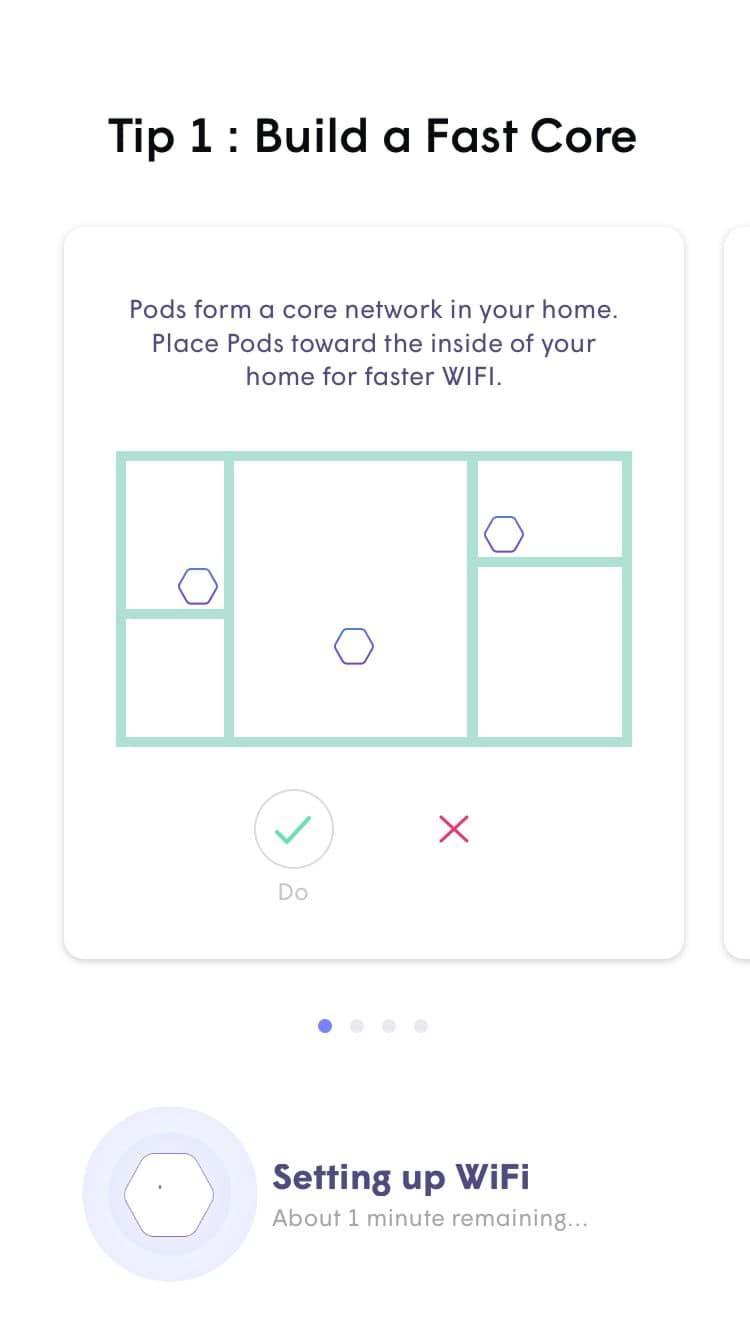
5. The app will prompt you to enter a WiFi name (SSID) and password. Create a custom network name (remember this name will be visible to anyone in range), and a secure password. Then tap Next.
6. Once the primary pod is connected and you've created your network, the status light on the pod will turn off. The primary pod will now start searching for the remaining pod. At the bottom of the app screen, you’ll see your network configuration progress.

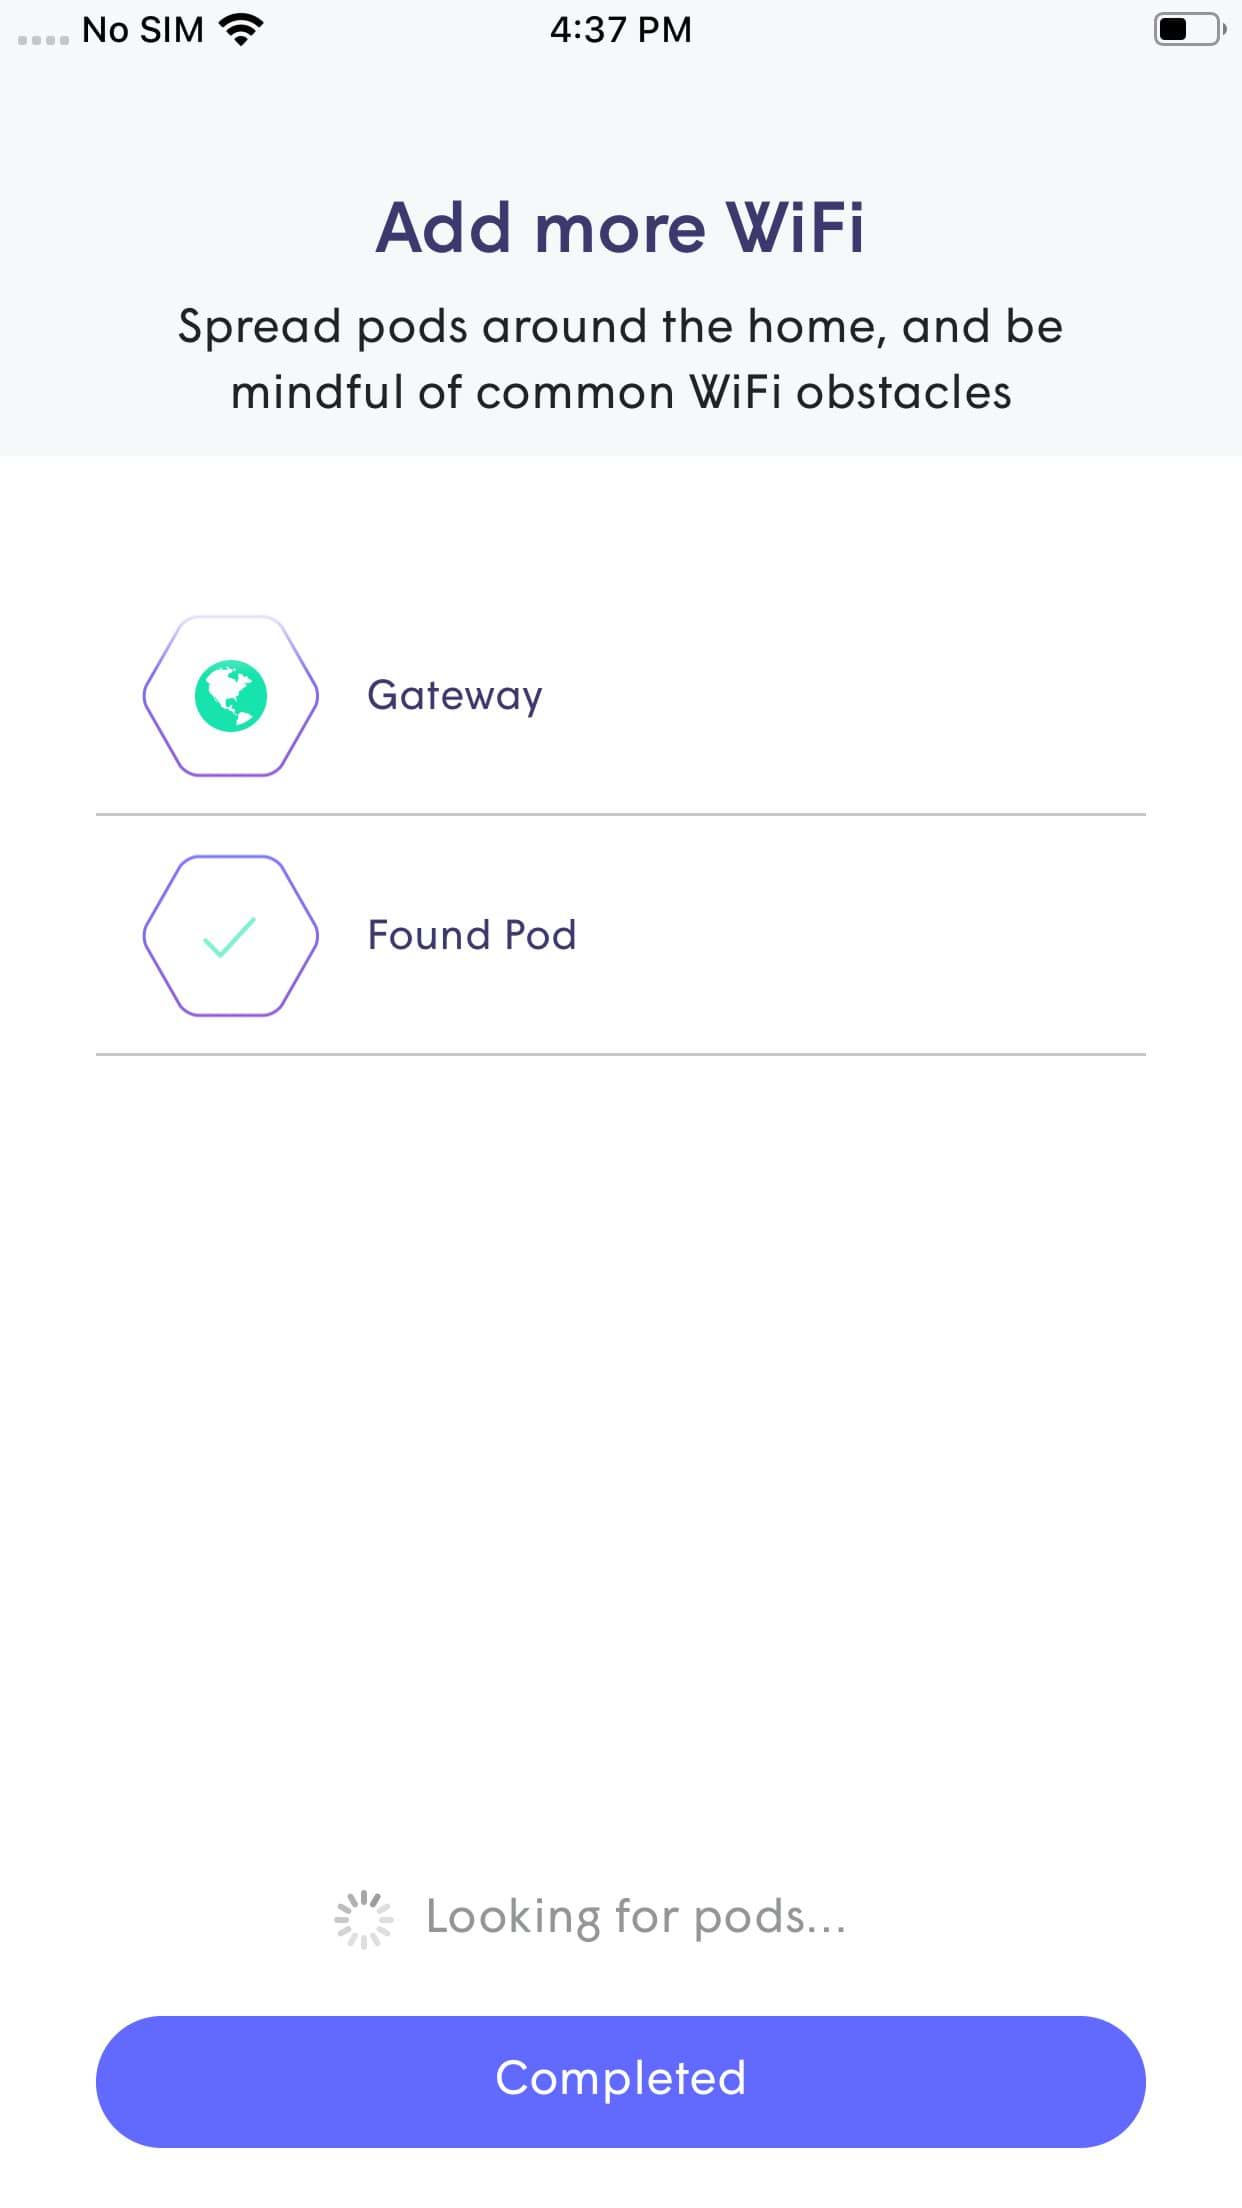
Connect the second pod
Did a technician already install your pods? You can skip to connecting devices.
7. Follow the tips in the app (or the advice of your technician) for the best placement of your second pod. As it connects to the network, you'll see a green check mark in the app, and the status light on the pod will turn off.
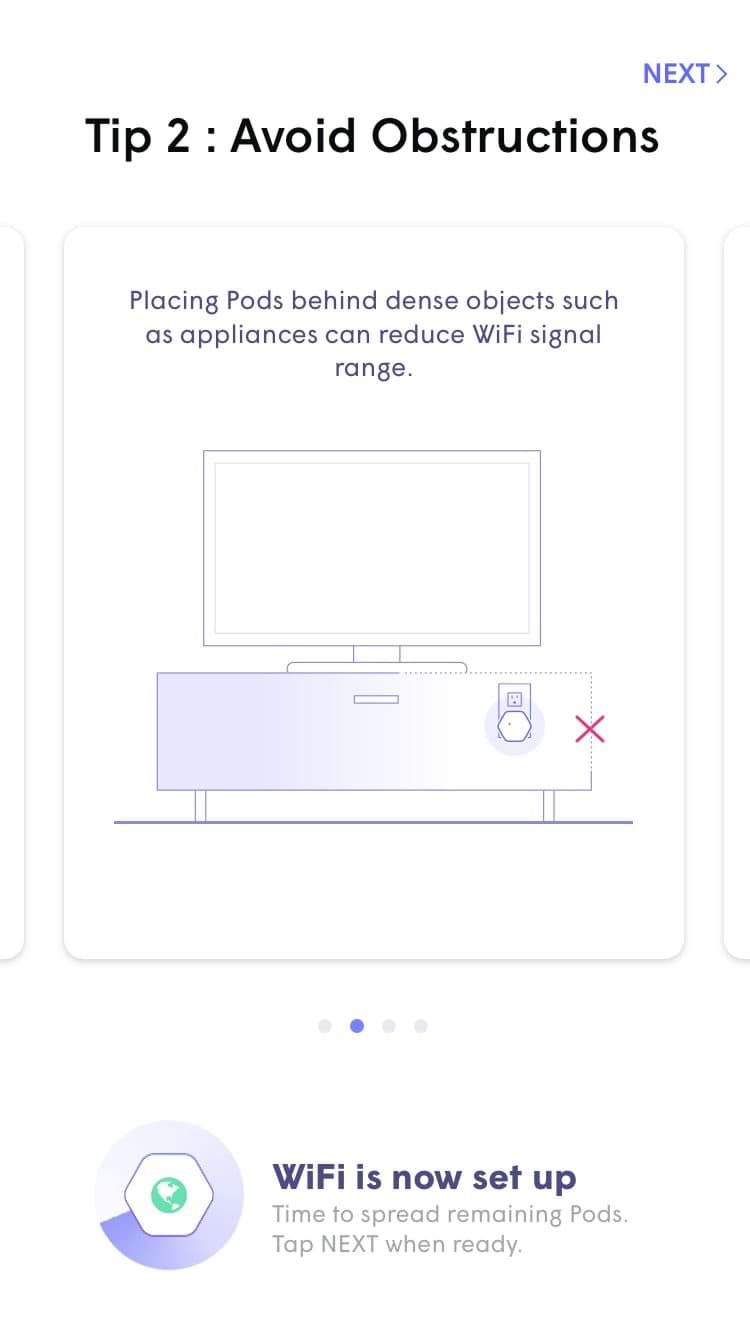
8. When you’ve finished connecting the second pod, tap Completed.
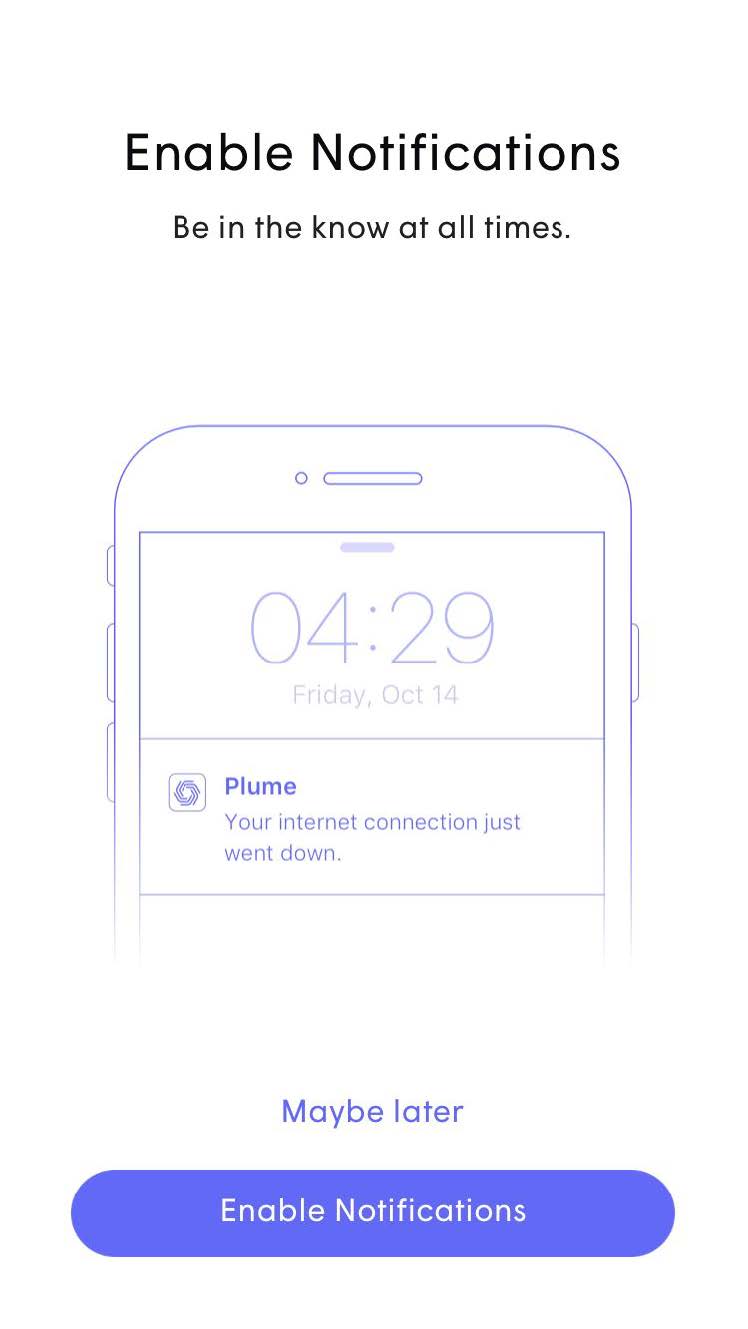
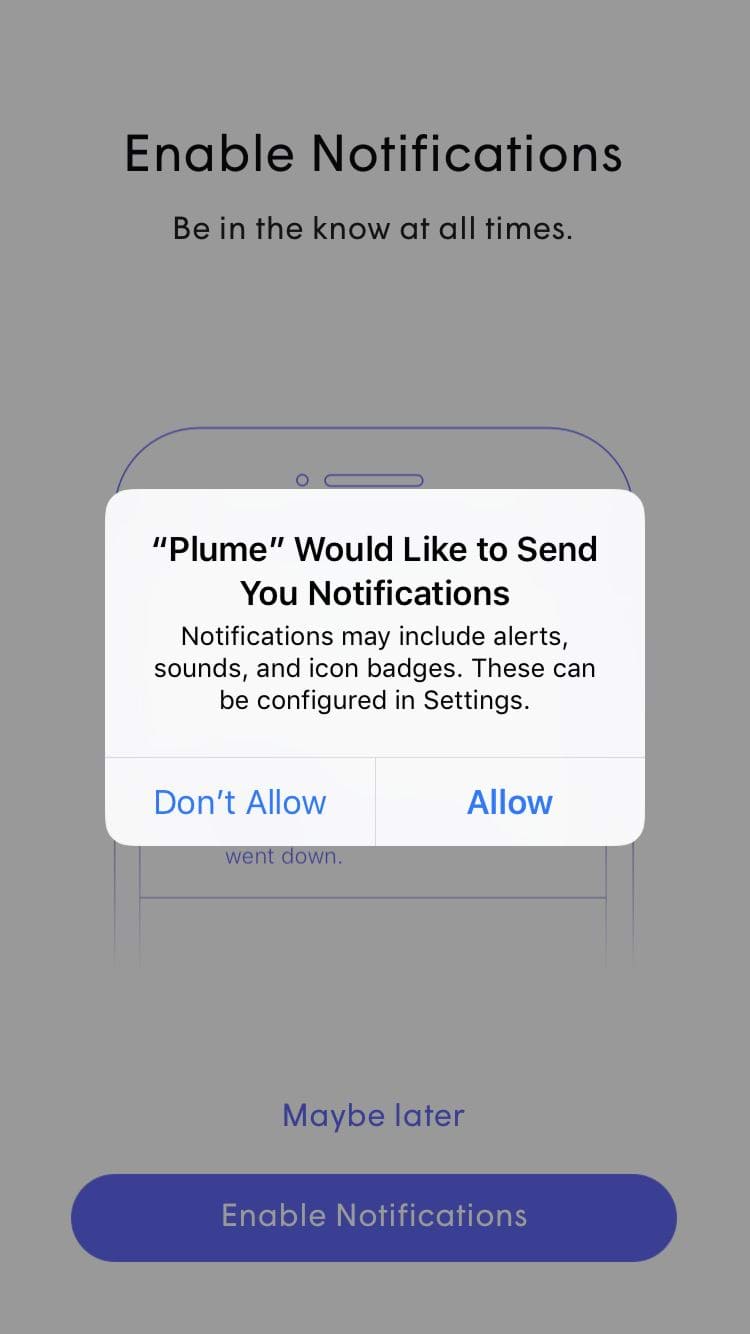
9. Now you'll be asked to turn on app notifications. You can get security alerts and tips about home network activities. Enable notifications now, or skip this step and update notifications later in your HomePass app settings.
Connect devices to your network
10. You'll see a message on your mobile device prompting you to join the new WiFi network. Tap Join to be taken into your device settings. Enter the WiFi password you created in step 5 and connect.
In the HomePass app, you'll see a Welcome Aboard message showing the device is connected and the network is up and running.

11. Repeat the above steps (now or later) for all of your connected devices. Go into each device's WiFi settings, locate the network you created, enter the password you set, and connect.
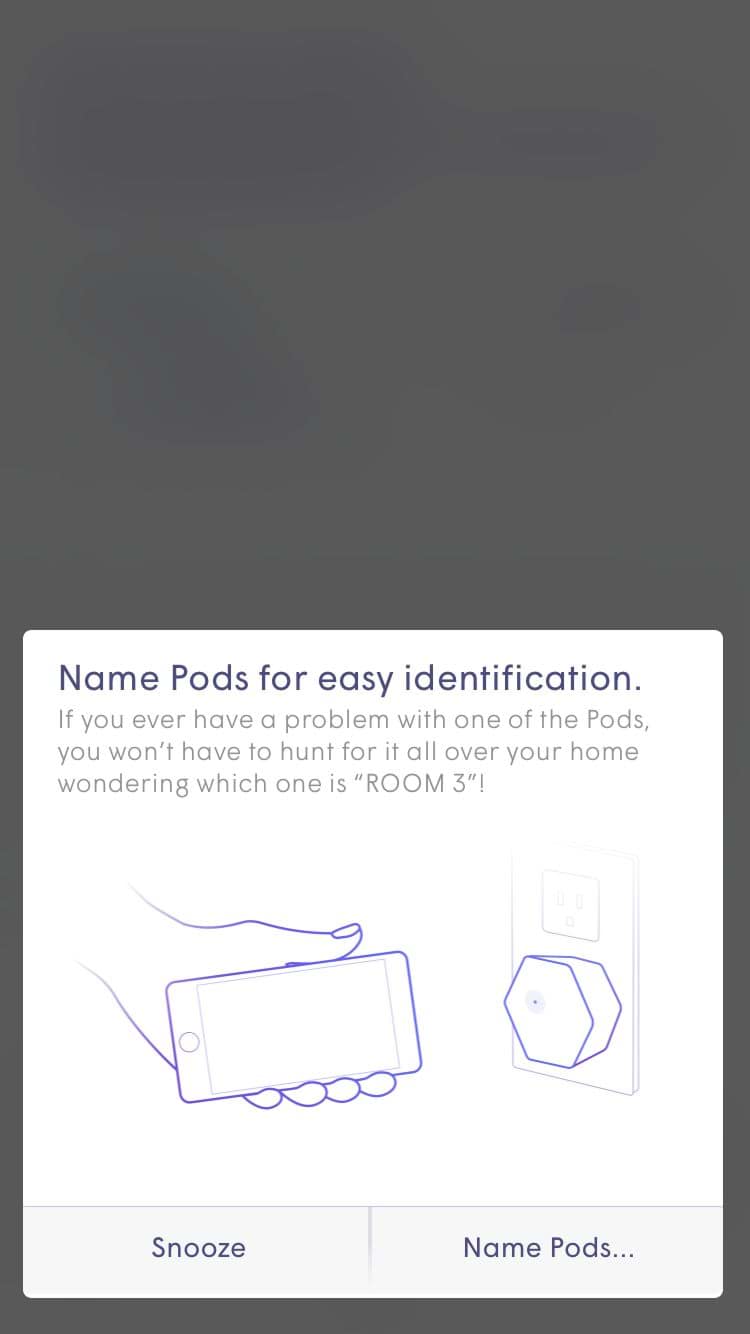
Name your pods
Giving the two pods different names makes it easier to identify them when managing your network. However, you can tap Snooze if you want to skip this step. You can also come back and do it later.
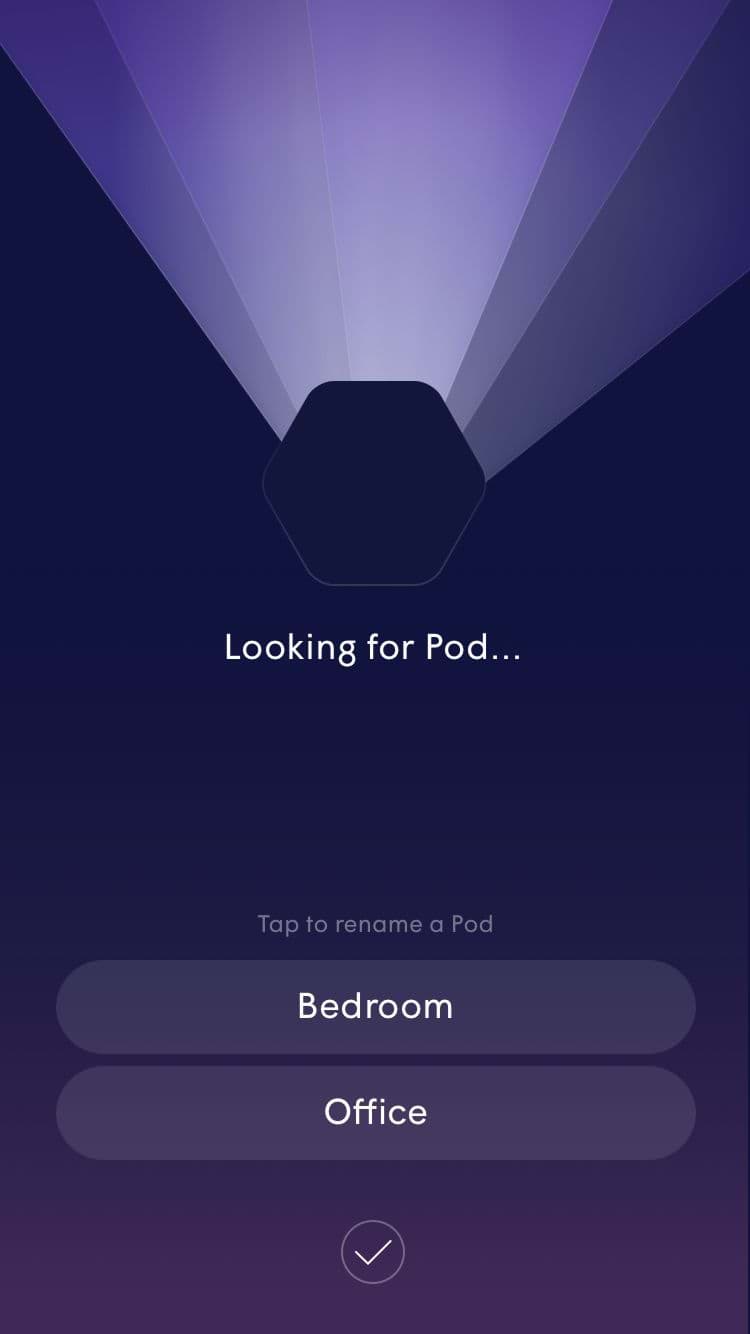
12. To name each pod, bring your mobile device close to it until it shows in the app. Choose from a list of default names, or create your own.
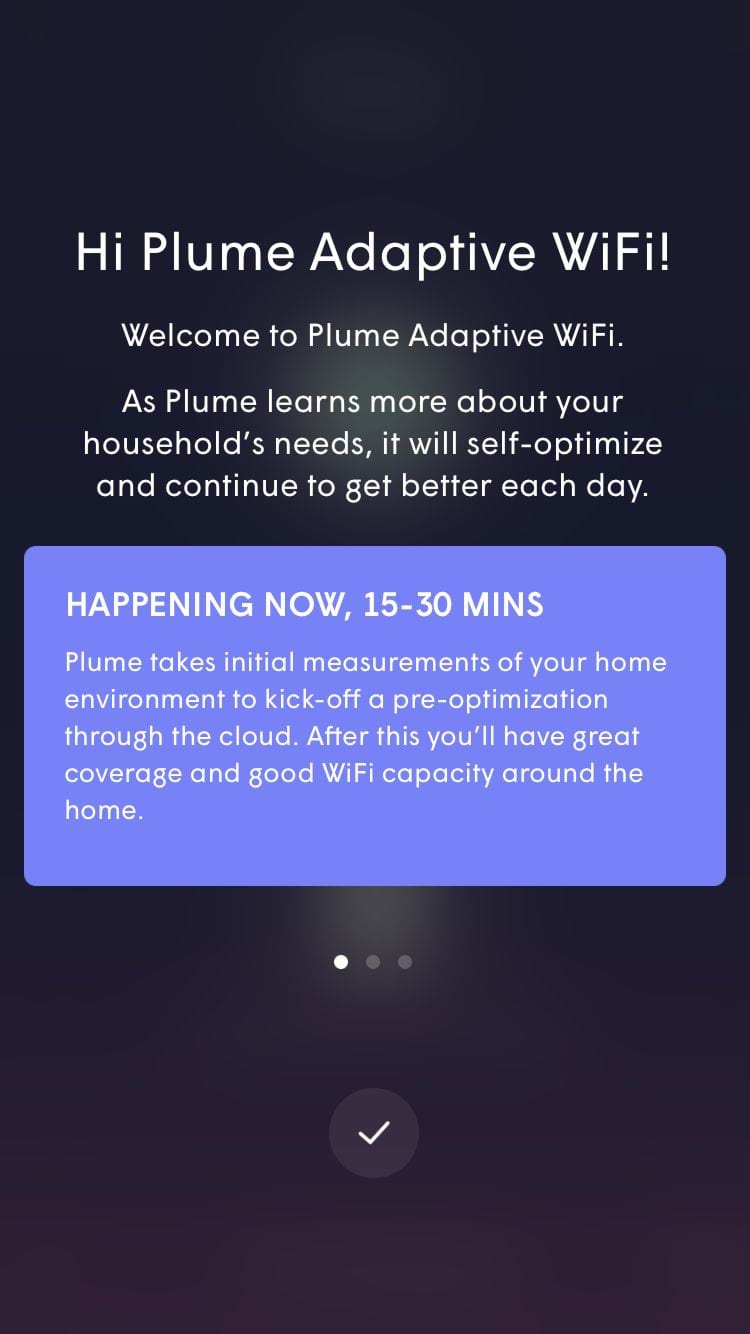
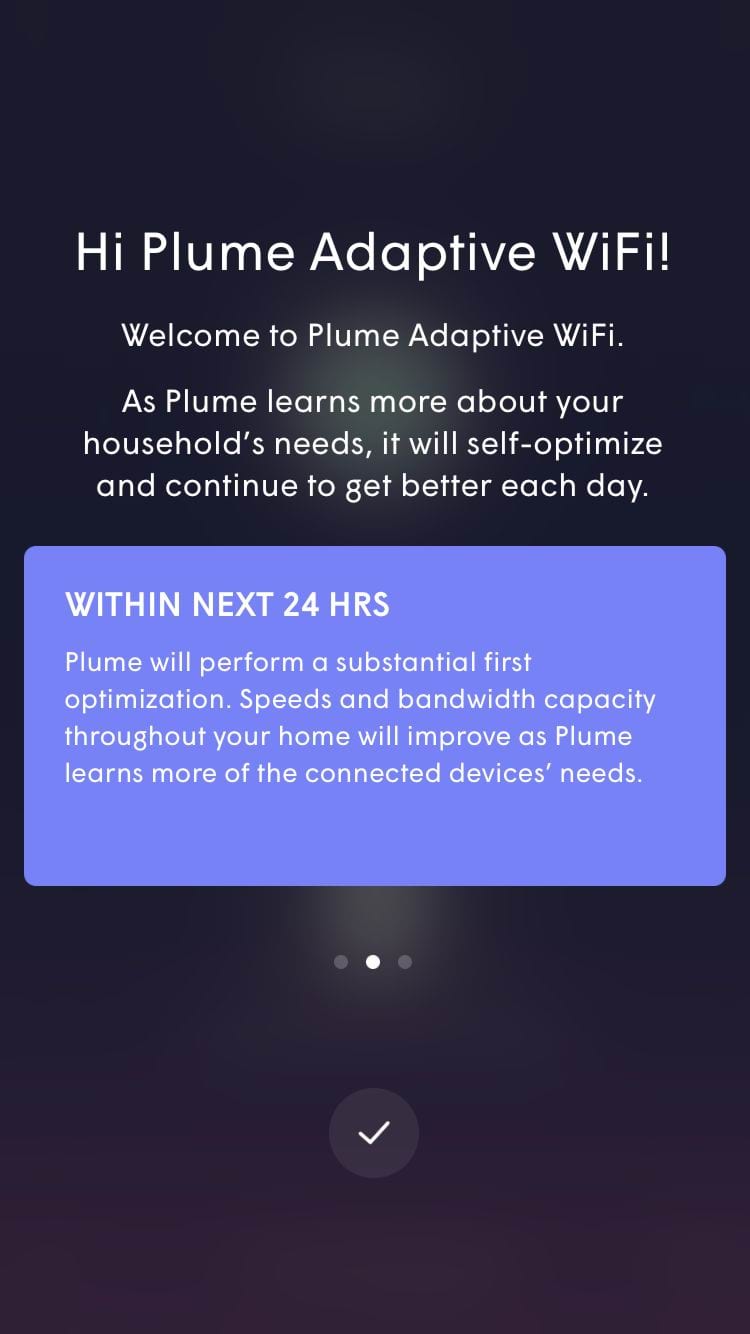
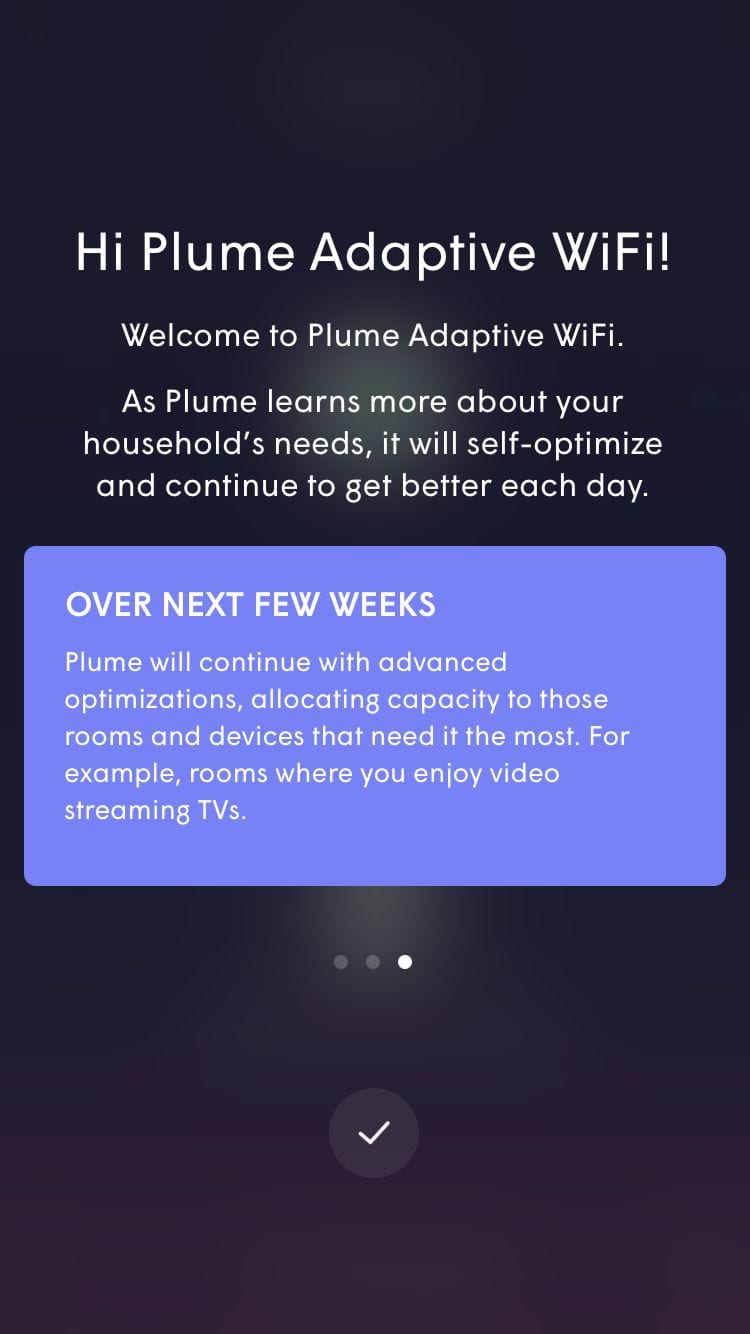
Allow your network to optimize
13. Your WiFi network is ready to start optimizing.
Optimization will run at about 2 a.m. each night, or as needed, depending on various network factors. The app will tell you what to expect over the next few weeks.
Your Premium WiFi is now ready to use! The built-in A.I. will continue to adapt and improve. As your pods send information about your usage patterns to the cloud, your network will get smarter and more efficient.
NOTE: To get protection through the WiFi system's built-in security, devices must be connected to the WiFi network, rather than plugged directly into the SmartNID.
Top Tools
Did you find the help you were looking for today?
Support topics
About Lumen | About CenturyLink | Careers | Investor Relations | Newsroom | Legal | Privacy Notice | Tariffs | Customers with Disabilities | Site Map | Cookie Settings | CenturyLink in Your Area | CenturyLink.net | Quantum Fiber in Your Area | White/Yellow Pages | Centurylink Retailer
Residential | Small Business | Enterprise | ©2024 CenturyLink. All Rights Reserved.