We no longer support this browser. For an optimal experience, we recommend updating your browser.
Enable WiFi on your modem
To access your WiFi network, you need to make sure this function is enabled on your router/modem. If the wireless light on your modem is off, then you need to turn on the setting on your modem using the modem interface.
Depending on the device, you may also need to enable WiFi on your computer.
Note: Your modem settings may appear slightly different from the images below, but the steps will be the same.
How to turn on WiFi in the modem settings
1. Connect a device, such as a computer or tablet, to the internet using an Ethernet cable connected to your modem.
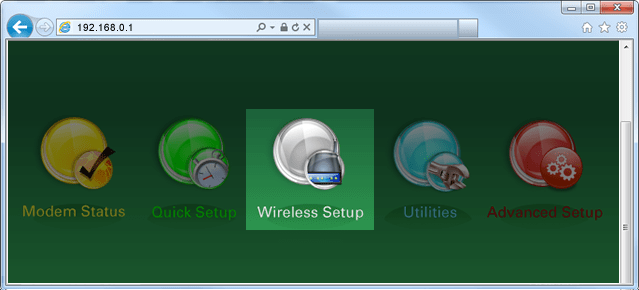
2. Open a web browser and type http://192.168.0.1 into the web address field.
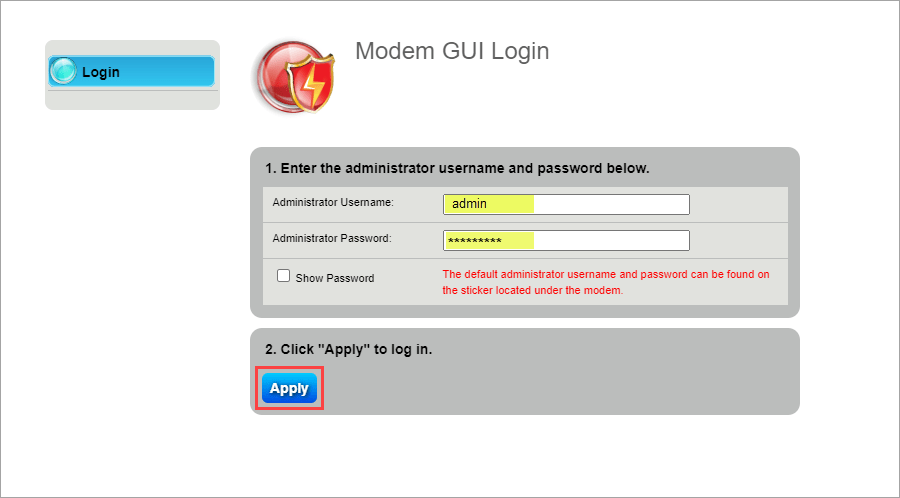
3. Sign in to the modem's settings interface (Modem GUI) using your Admin Username and Admin Password. Note that these are different from your wireless network name (SSID) and WiFi password (security key).
Close
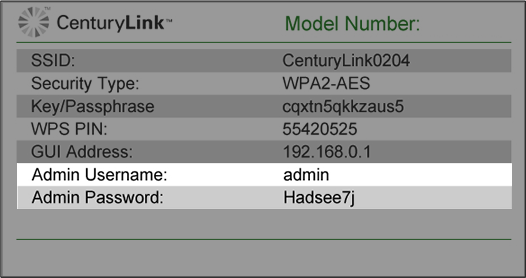
You can find the Admin Username and Password printed on the sticker attached to the side, back or bottom of the modem.
CAUTION! Do not remove your modem sticker. It includes your default Admin Username and Admin Password, which cannot be retrieved if lost. Your modem could become unusable without them.
Close
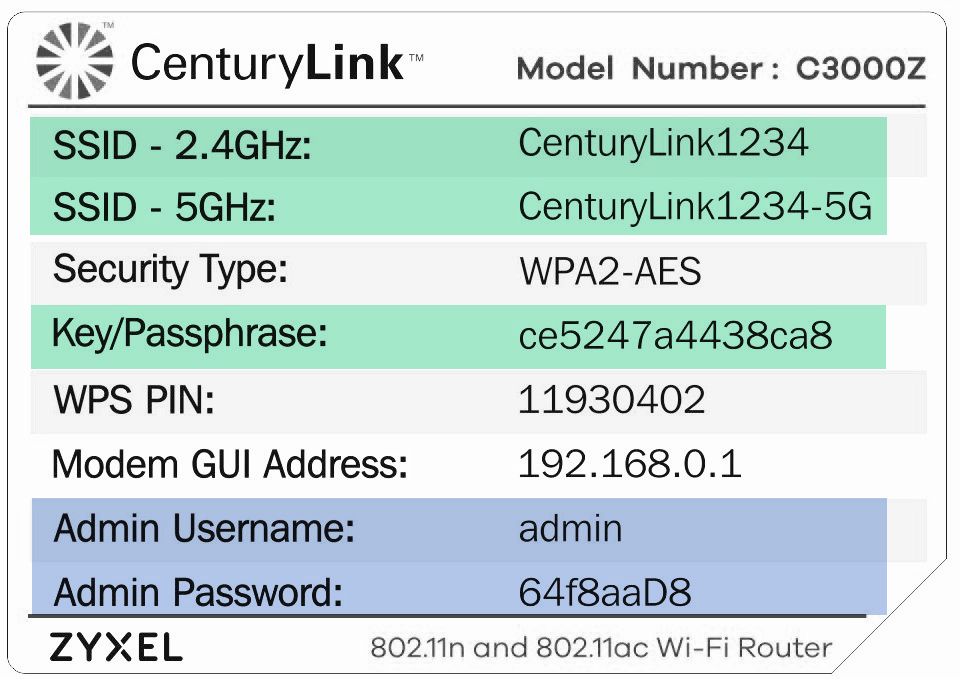
The modem sticker shows you TWO important sets of login credentials. How do you use each one?
SSID and Key/Wireless Password: Used to access and connect to your WiFi network
- SSID is the name that will show up on your devices in the list of wireless networks (may have two for dual-band modem/routers)
- Key/Wireless Password is the password you will enter on your devices to connect securely to your network
- These default settings can also be customized in the modem settings or through the app
Admin Username and Admin Password: Used to log in to your modem settings portal
- Access secure settings such as firmware updates, WiFi security, schedules, and more
- When connected to your home network, go to http://192.168.0.1 to access the portal (also called the GUI)
- These default settings can also be customized in the modem settings
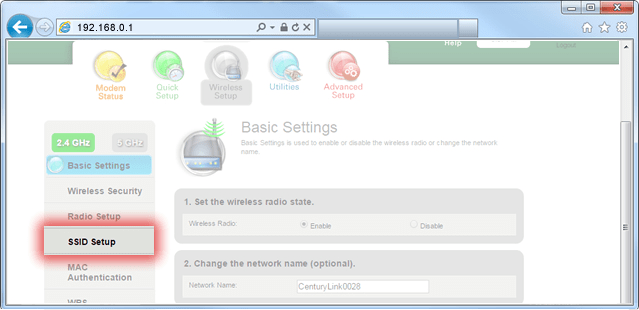
4. Select the Wireless Setup icon in the main menu.
5. Select Enable for the wireless radio.

6. Select Apply to save your changes.

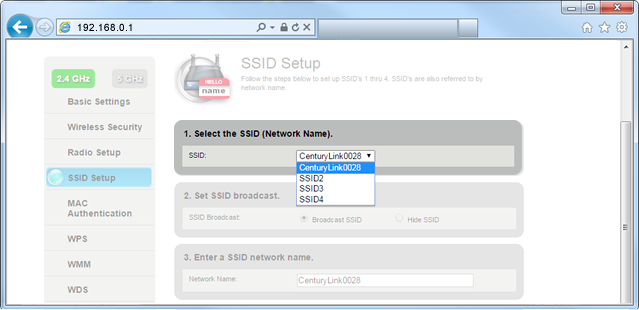
7. Next, select SSID Setup in the left side menu.
8. Select the network (SSID) that you are using.
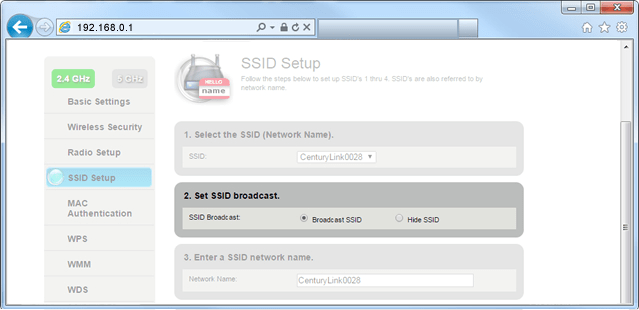
9. Select Broadcast SSID.
10. Select Apply to save your changes.
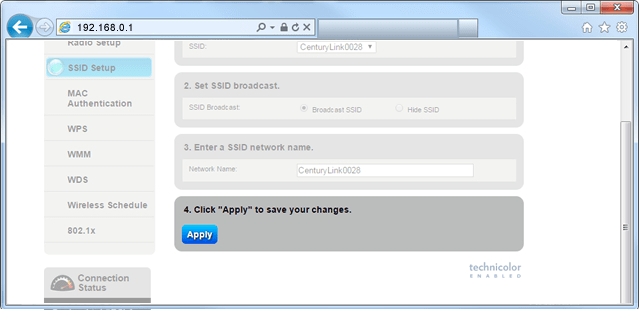
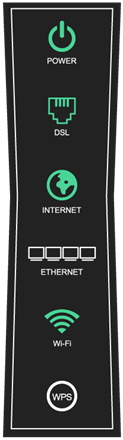
11. After the wireless light on your modem turns green, you can connect devices to your WiFi network.
All about WiFi
Top Internet Topics
-
Check for an outage -
Troubleshooting slow internet -
Speed hub -
Upgrade your service -
WiFi support -
Internet security
View all Internet topics
Shop WiFi Accessories
Expand your CenturyLink internet service with top WiFi performance accessories from our partners, including WiFi range extenders, smart power strips and more.
Top Tools
Was this information helpful?
Support topics
About Lumen | About CenturyLink | Careers | Investor Relations | Newsroom | Legal | Privacy Notice | Tariffs | Customers with Disabilities | Site Map | Cookie Settings | CenturyLink in Your Area | CenturyLink.net | Quantum Fiber in Your Area | White/Yellow Pages | Centurylink Retailer
Residential | Small Business | Enterprise | ©2024 CenturyLink. All Rights Reserved.