We no longer support this browser. For an optimal experience, we recommend updating your browser.
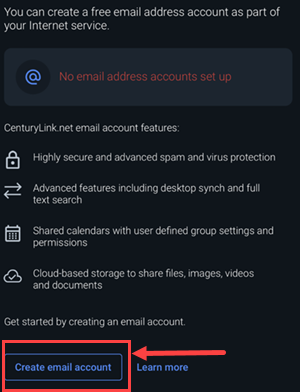
Set up a CenturyLink email account
Your CenturyLink High-Speed Internet service includes an email account. Learn how to create your account.
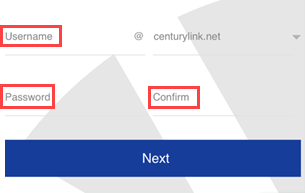
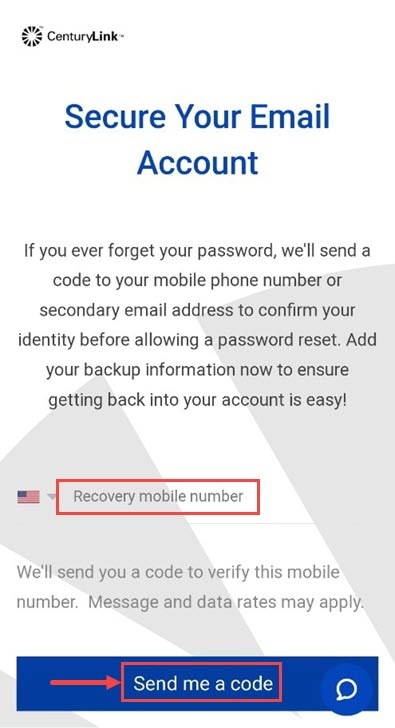
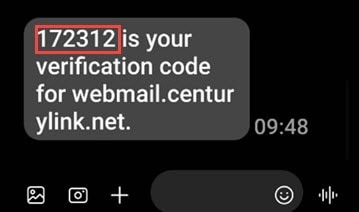
How to create your email address
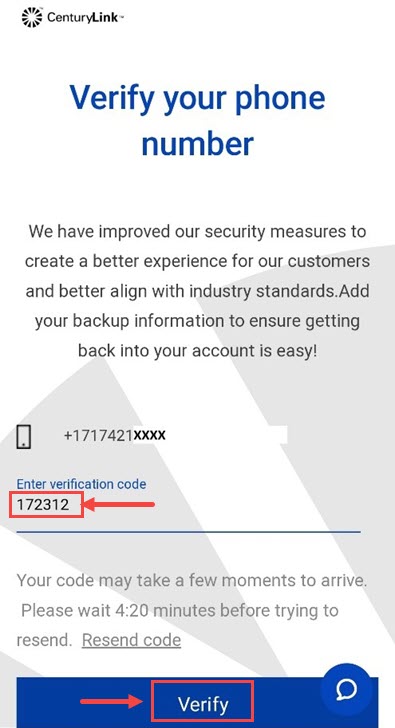
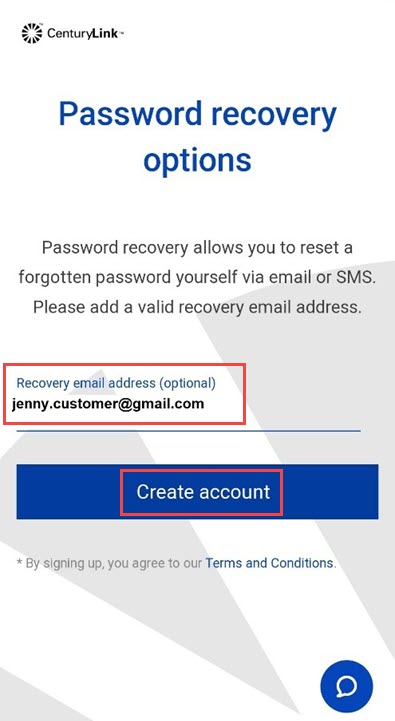
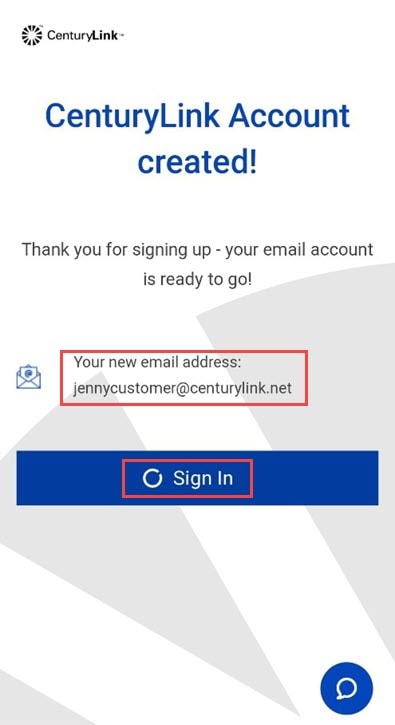
You can create your new CenturyLink email address using the My CenturyLink app.
1. Sign in to the My CenturyLink app
2. Scroll to the menu at the botttom of the screen and tap My Services

Check your CenturyLink email using your preferred program
You can set up your CenturyLink email on other email programs and on multiple devices.
For all programs and devices, you will need the POP/IMAP server settings as you follow the instructions for your specific device or program.
Q.com to MyCTL.net
Check email, browse news, and more.
Keep your CenturyLink email active
CenturyLink email accounts that are unused for a year are deactivated and all contents deleted.
To keep your CenturyLink email active, be sure to sign in at least once a year.
Visit our dedicated CenturyLink email support site.
Troubleshoot problems with your service
Was this information helpful?
Support topics
About Lumen | About CenturyLink | Careers | Investor Relations | Newsroom | Legal | Privacy Notice | Tariffs | Customers with Disabilities | Site Map | Cookie Settings | CenturyLink in Your Area | CenturyLink.net | White/Yellow Pages | Centurylink Retailer
Residential | Small Business | Enterprise | ©2026 CenturyLink. All Rights Reserved.