We no longer support this browser. For an optimal experience, we recommend updating your browser.
How to set up static IP with your SmartNID
If you already have a static IP address, you can sign in to the user settings (GUI) for your SmartNID fiber modem to manage setup as shown in the steps below.
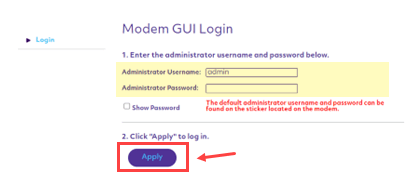
Step 1: Sign in to your modem (SmartNID) user settings
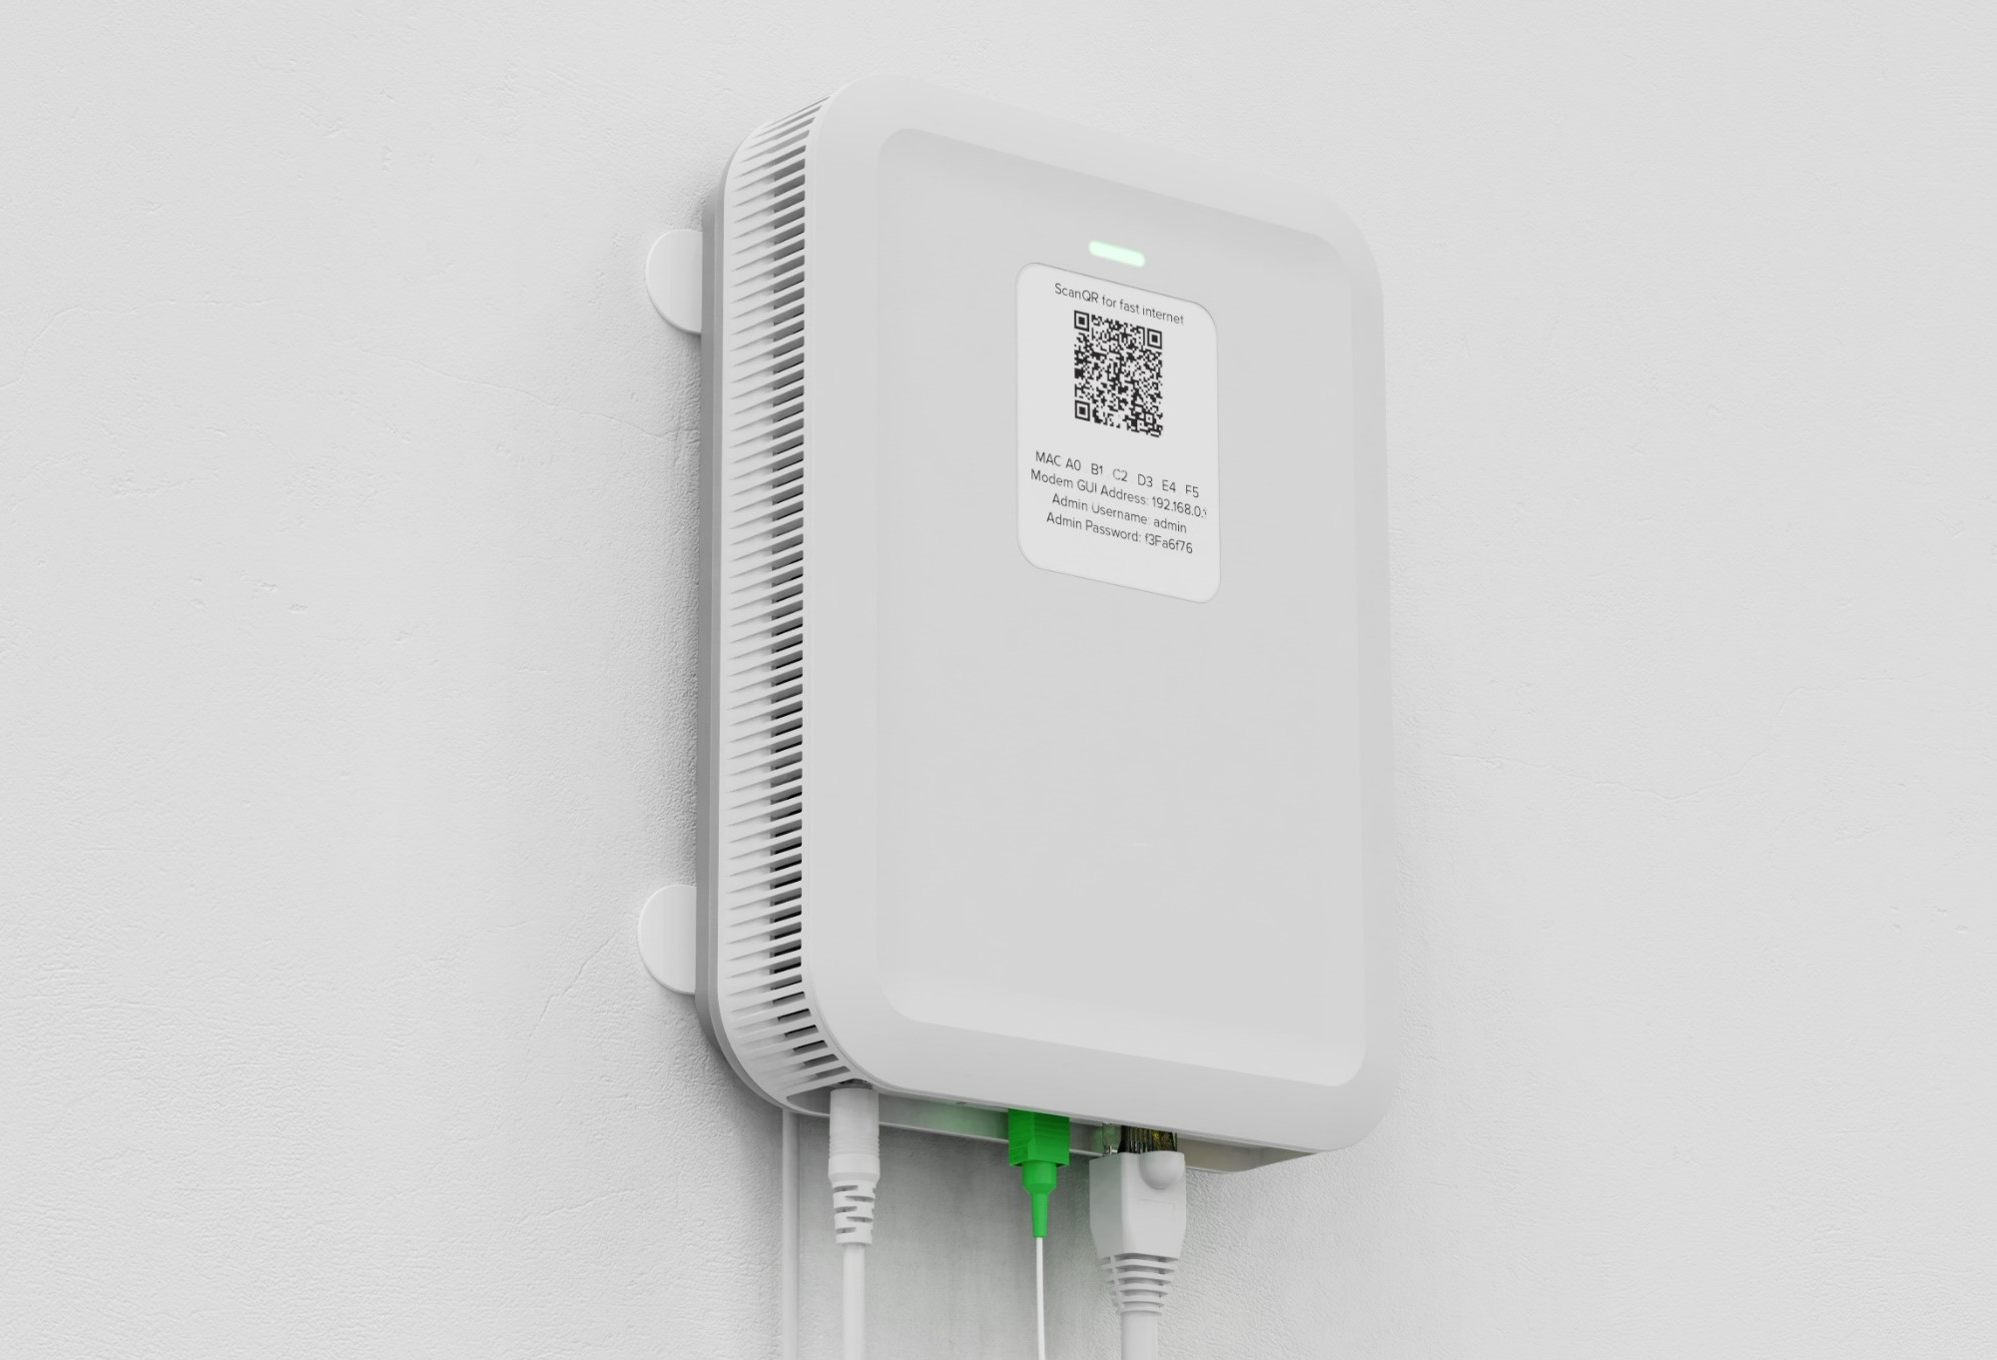
- Using an Ethernet cable, plug a computer into the LAN port on the bottom of your C5500XK SmartNID.
- Open a browser window and type 192.168.0.1 into the URL or address field.
- On the Modem GUI Login screen, enter the admin username and password printed on the sticker attached to the front of the SmartNID.
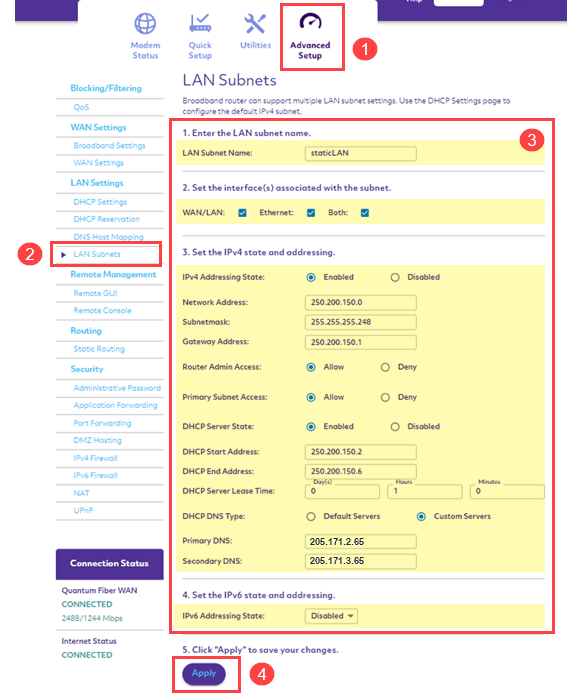
Step 2: LAN subnets settings
Select Advanced Setup from the main menu, then select LAN Subnets from the left side menu. Complete the settings as follows:
- Section 1 - Enter the LAN subnet name of your choice
- Section 2 - Select the interfaces you wish to enable (WAN/LAN, Ethernet, or both)
- Section 3
- For "IPv4 Addressing State," select Enable
- Enter the Network Address, Subnetmask, and Gateway Address provided in your Static IP order form (sample shown in the image below)
- For "Router Admin Access," select Allow
- For "Primary Subnet Access," select Allow
- For "DHCP Server State," select Enabled and enter the start and end address from your Static IP order
- For "DHCP DNS Type," select Custom Servers
- For "Primary DNS," enter 205.171.2.65
- For "Secondary DNS," enter 205.171.3.65
- Section 4 - Keep "IPv6 Addressing State" set to Disabled
Select Apply to save your settings.
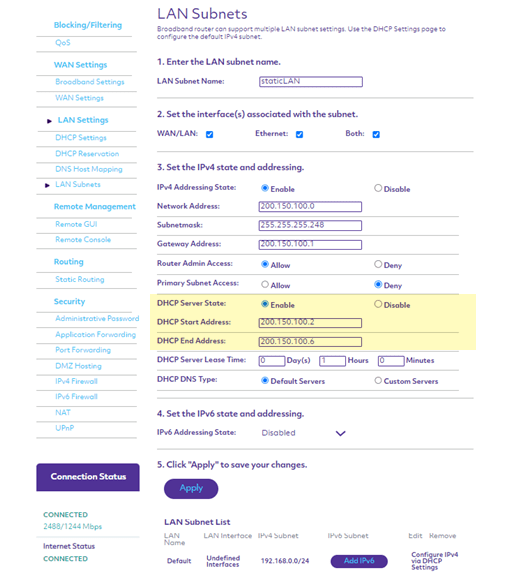
Step 2 - Option to hand out IP block automatically
Complete settings in sections 1, 2, and 4 as shown above in Step 2. Complete the section 3 settings as show below:
- For "DHCP Server State," select Enable and enter the range of IP addresses to be handed out
- Keep "Primary Subnet Access" set to Deny
- Keep "DHCP DNS Type" set to Default
Select Apply to save your settings.
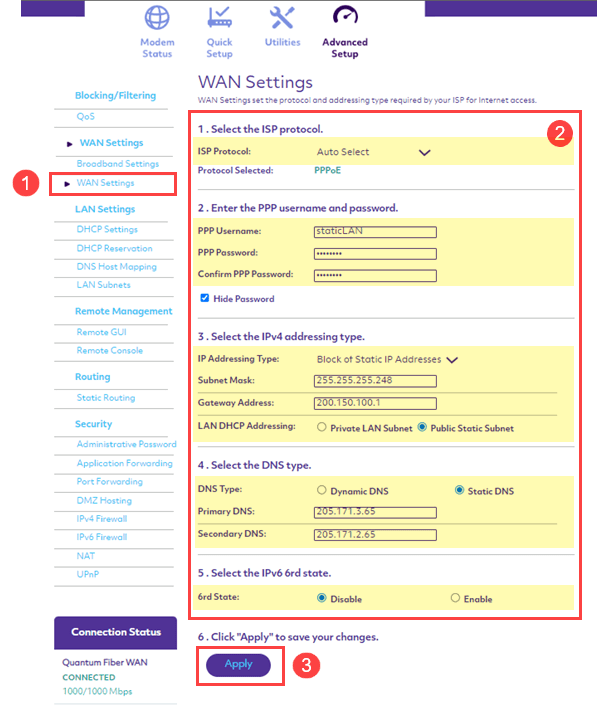
Step 3: WAN and DHCP settings
Select WAN Settings from the left side menu and complete the settings as follows:
- Section 1 - Keep "ISP Protocol" set to Auto Select
- Section 2 - Enter the PPP username and password provided in your static IP order.
- Section 3
- For "IP Addressing Type," select Block of Static IP Addresses from the drop-down list.
- Enter the Subnet Mask and Gateway Address you received in your order information
- For "LAN DHCP Addressing," select Public Static Subnet
- For "IP Addressing Type," select Block of Static IP Addresses from the drop-down list.
- Section 4
- Keep "DNS Type" set to Static DNS
- For "Primary DNS," enter 205.171.2.65
- For "Secondary DNS," enter 205.171.3.65
- Section 5 - Keep "IPv6 6rd State" set to Disable
Finally, select Apply to save your settings. You can now close the GUI settings portal. Your static IP setup is complete and you can get online!
If you need more assistance, contact our support team. We're here to help!
Top Internet Topics
-
Check for an outage -
Troubleshooting slow internet -
Speed hub -
Upgrade your service -
WiFi support -
Internet security
View all Internet topics
Top Tools
Was this information helpful?
Support topics
About Lumen | About CenturyLink | Careers | Investor Relations | Newsroom | Legal | Privacy Notice | Tariffs | Customers with Disabilities | Site Map | Cookie Settings | CenturyLink in Your Area | CenturyLink.net | White/Yellow Pages | Centurylink Retailer
Residential | Small Business | Enterprise | ©2026 CenturyLink. All Rights Reserved.