Firmware is the software programmed into your modem that makes it run. Firmware is updated periodically to add new features and keep modems performing their best. Firmware updates are done automatically through the CenturyLink network, so as a rule you never have to think about it. However, if your modem isn't working properly, you can sign in to your modem settings to make sure the firmware is up-to-date.
Before you start, keep these tips in mind:
We recommend connecting your device directly to your modem with an Ethernet cable, if possible, to get the most stable internet connection. If this isn't an option, you can use a wireless (WiFi) connection.
Updating firmware will NOT reset your custom modem settings, so you do not need to back them up first.
Note: Your modem settings may appear slightly different from the images below, but the steps will be the same.
1. Connect a device to your network over WiFi or using an Ethernet cable connected to your modem. This works best on a tablet or computer.
2. Open a web browser and type http://192.168.0.1 into the web address field.
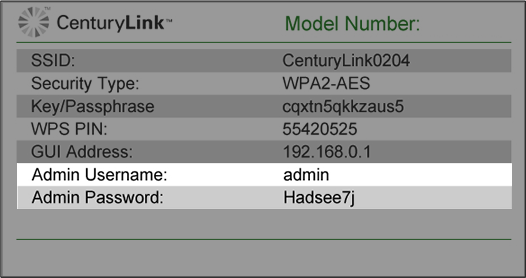
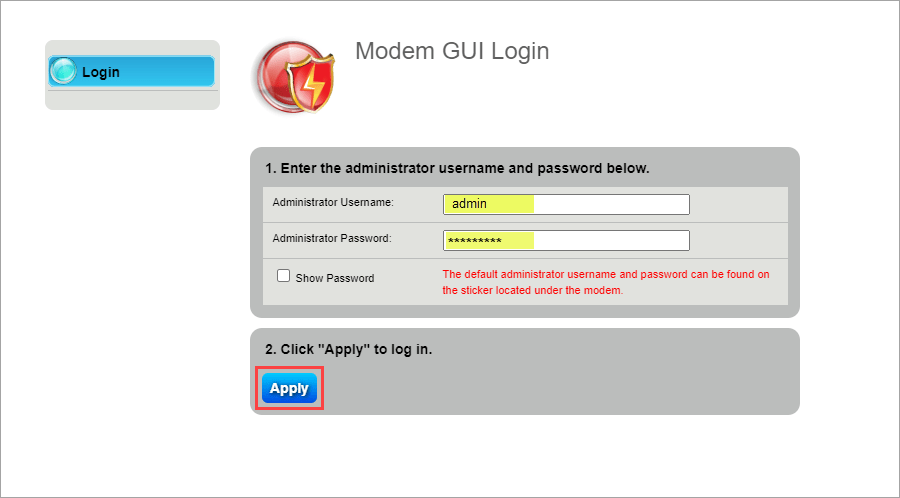
3. Sign in to the modem settings (GUI) using your Admin Username and Admin Password, printed on the sticker.
You can find the Admin Username and Password printed on the sticker attached to the side, back or bottom of the modem.
CAUTION!Do not remove your modem sticker. It includes your default Admin Username and Admin Password, which cannot be retrieved if lost. Your modem could become unusable without them.
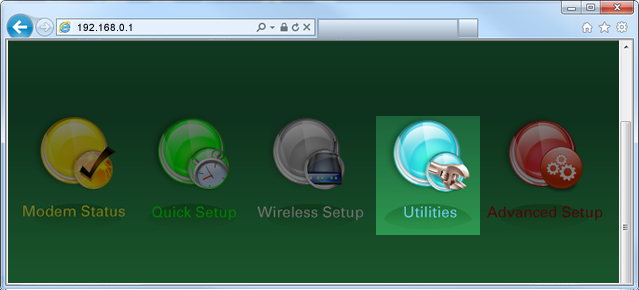
4. Select Utilities in the main menu.
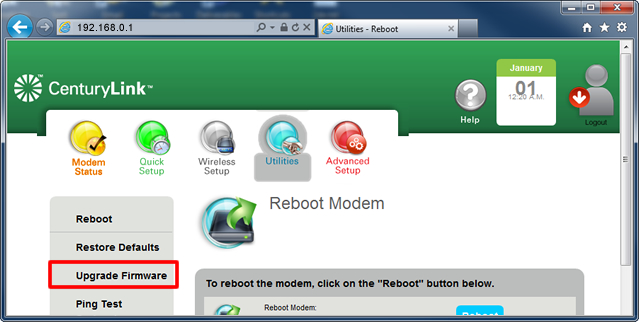
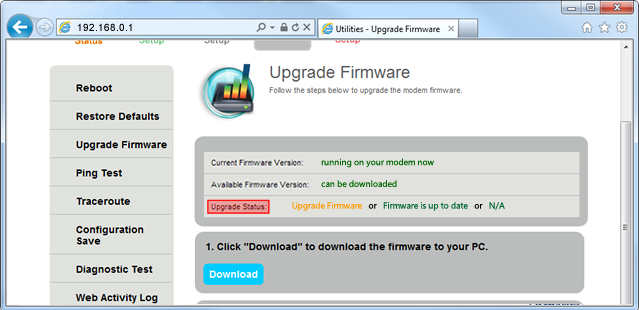
5. Select Upgrade Firmware in the left sidebar.
6. Check the Upgrade Status area.
If it says Upgrade Firmware, proceed to step 7 to continue the update.
If it says Firmware is up to date or N/A, you don't need to update. You're all done! You can sign out and close the modem settings page.
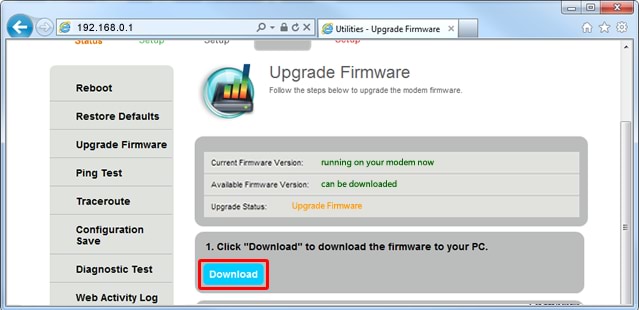
7. To update the firmware, first you'll download the file to your computer. Select Download on the Upgrade Firmware screen.
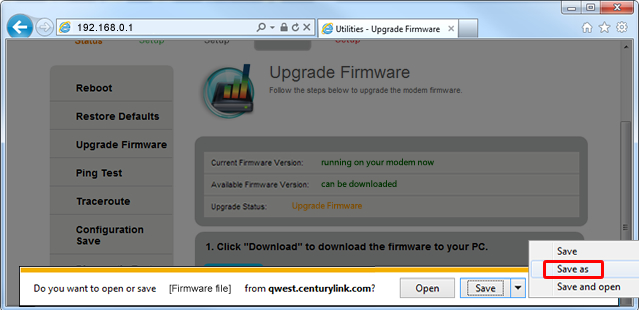
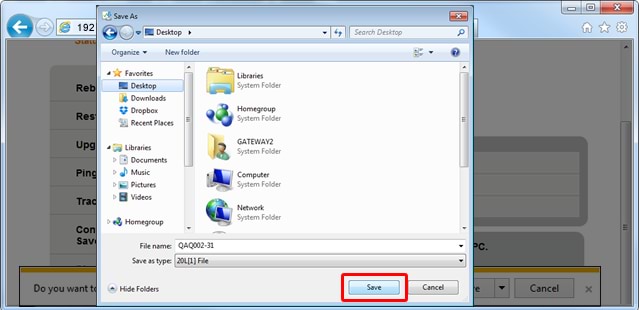
8. Follow your browser's prompts to save the file using Save as.
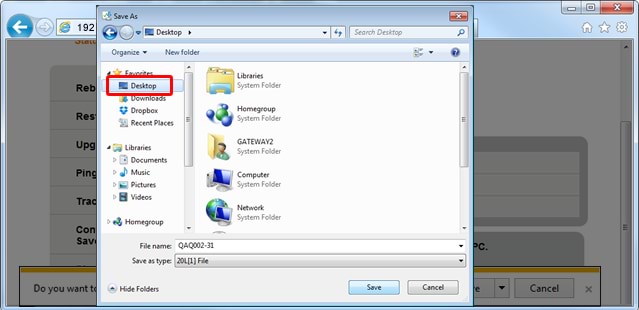
9. Select Desktop (or choose another folder if you prefer), then click Save. The downloaded firmware file is now saved on your computer.
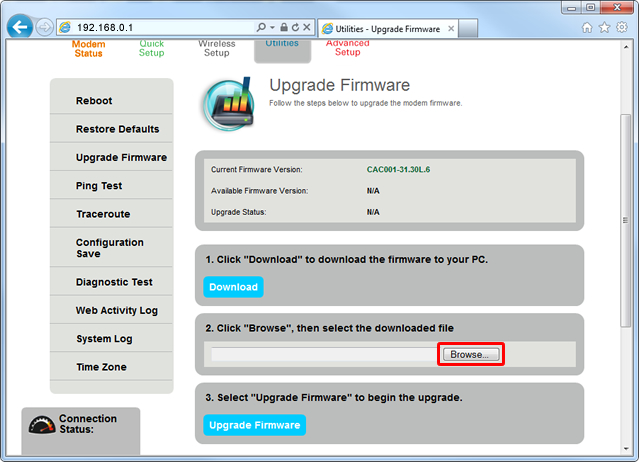
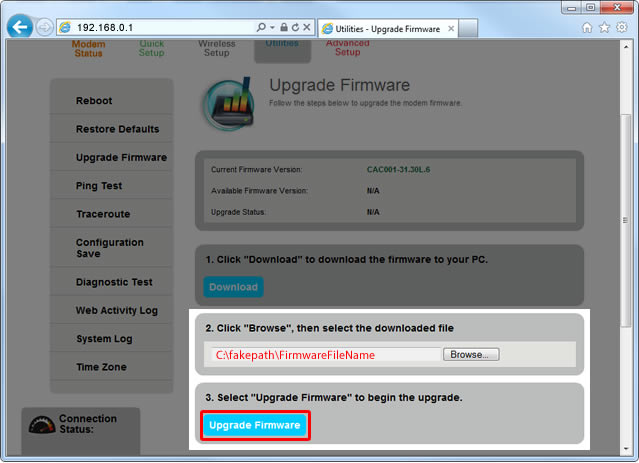
10. Next, you'll install the firmware file you saved in the previous step by browsing to it. Select Browse on the Upgrade Firmware screen.
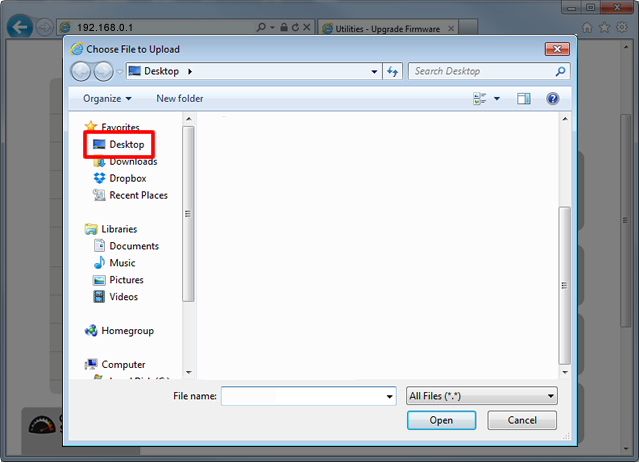
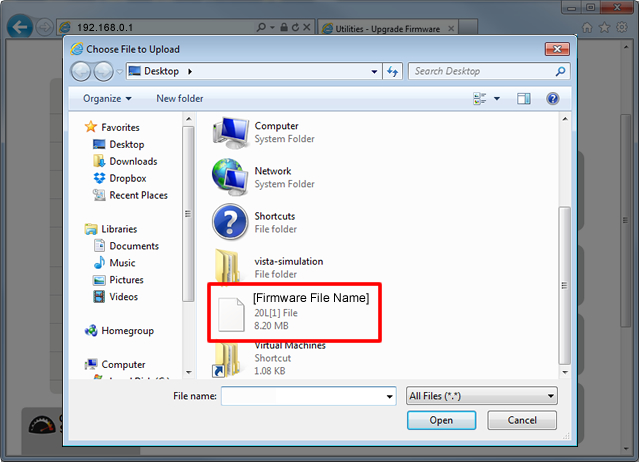
11. Find the folder on your computer where you saved the file in step 9. Select the firmware file, then click Open.
12. Select Upgrade Firmware to start the update.
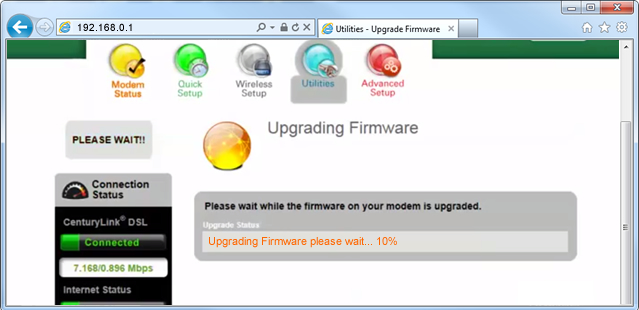
13. The screen will show you the progress of the upgrade installation. This step will take about 2 minutes.
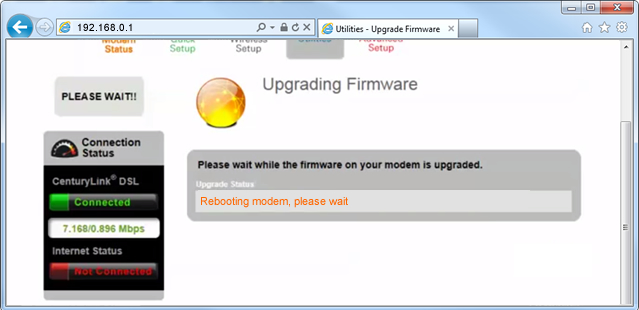
14. Next, you'll see a screen telling you that the modem is rebooting. This step will take about 3 minutes. As the modem reboots, you will briefly lose your internet connection, including WiFi.
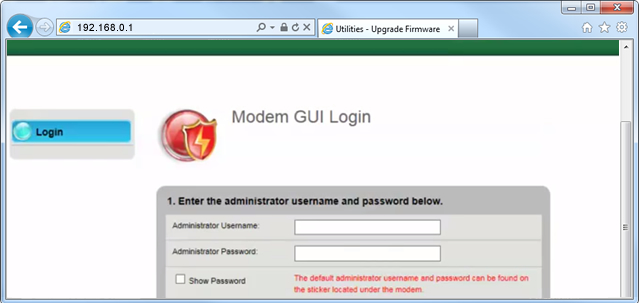
15. Once the upgrade is complete, you will be taken back to the main Modem GUI Login screen. Wait 2-5 minutes for the DSL and internet lights on the modem to turn green before trying to browse to a webpage to test that your connection is good.
If the internet light doesn't turn green, check our modem lights guide for troubleshooting help.
If you need further assistance, contact our technical support team. We're here to help.