We no longer support this browser. For an optimal experience, we recommend updating your browser.
How to reboot your modem
Rebooting your modem is the first thing to do when your internet connection is slow or spotty. A quick reboot does the following:
- Clears the modem's memory
- Refreshes the network connection
- Locates the best WiFi channel to reduce interference
You can reboot manually, and many customers can also do it through our app or on the My CenturyLink website.
Important: Always reboot your modem after an outage.
Note: All devices on your network will lose their connection to the internet while the modem restarts. Devices set to remember your network will reconnect automatically once it boots back up. Otherwise, you'll need to use device settings to reconnect.
How to reboot manually
To reboot your modem manually, follow these steps:
- Unplug the power cord from the back of the modem or from the wall outlet, whichever is easier. Check that all the lights on the modem go off to make sure you unplugged the right cord.
- Wait 30 seconds to 1 minute. Be patient! Wait a minimum of 30 seconds to allow the modem memory to fully clear.
- Plug the power cord back in and wait for the power light and internet light to turn green (or the C4000 single status light). It can take 3-5 minutes to fully boot back up.
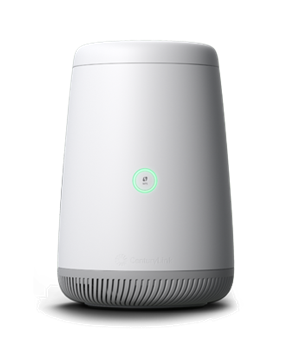
Green light on the C4000 modem shows internet connection.
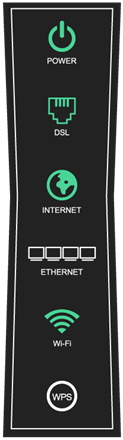
Green power, DSL and internet lights on a tower modem show internet connection.
How to reboot from My CenturyLink
With several of our CenturyLink modems, you can reboot from the app or website. If this option hasn't been added yet for your modem, it's coming soon!
Download the My CenturyLink app
Once you sign in to the app, select Services from the bottom menu. You can find two buttons here to restart your modem: one at the top of the screen in the top tasks area, and another when you scroll down to the Equipment section.
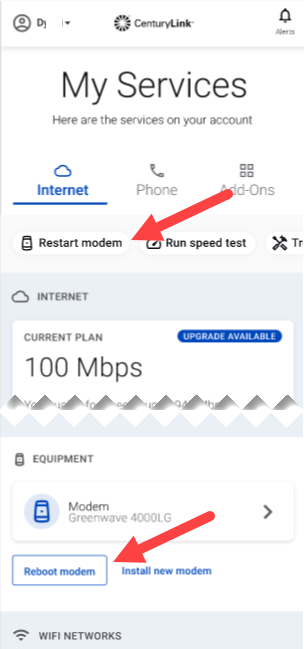
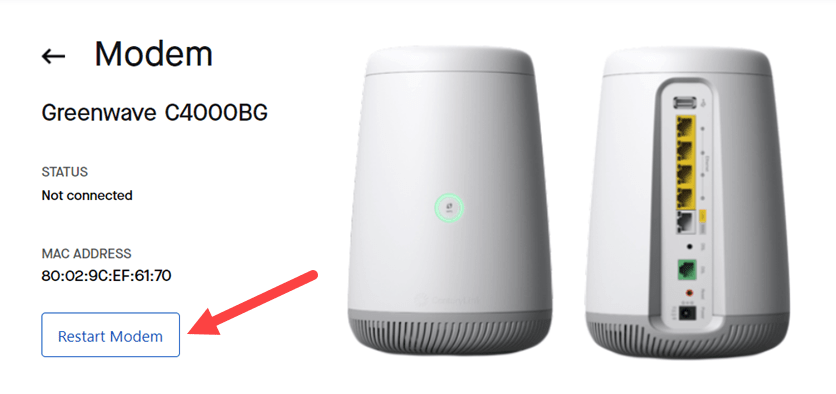
After you sign in to My CenturyLink, select Services from the top menu. Scroll down to the Equipment section, then click on the button for your modem.
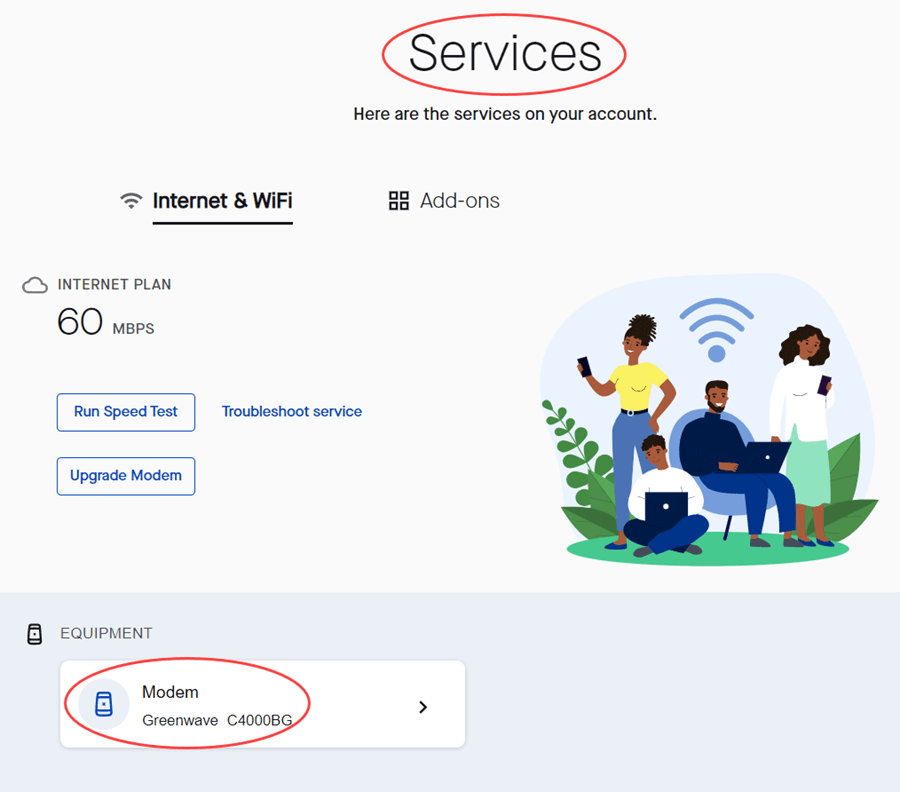
On the Modem page, click the Restart Modem button, then confirm to start the reboot.
You'll need to wait for a few minutes while the reboot completes. You can watch your modem lights or the internet/WiFi connection on one of your devices to know when your network is back up and running.
Still have a poor connection after rebooting?
Check for firmware updates, as outdated firmware can also cause performance issues. If you're still having trouble, use Troubleshooter to remotely test your modem and your line, or run through our steps to troubleshoot your internet connection on your own.
Use the CenturyLink app to manage your account and network.


Browse news, entertainment, weather, and more.
Top Tools
Was this information helpful?
Support topics
About Lumen | About CenturyLink | Careers | Investor Relations | Newsroom | Legal | Privacy Notice | Tariffs | Customers with Disabilities | Site Map | Cookie Settings | CenturyLink in Your Area | CenturyLink.net | Quantum Fiber in Your Area | White/Yellow Pages | Centurylink Retailer
Residential | Small Business | Enterprise | ©2025 CenturyLink. All Rights Reserved.