Access Scheduler allows you to select a specific device connected to your network and set days and times during which that device can access the internet.
Some modems use Secure WiFi to control this option
If you lease a C4000, C3000, or C1100, you can manage some features through our app as part of Secure WiFi. For those modem types, these options WILL NOT APPEAR in the modem settings: access scheduler, service blocking, and website blocking.
Note: Your modem settings may appear slightly different from the images below, but the steps will be the same.
1. Connect a device to your network over WiFi or using an Ethernet cable connected to your modem. This works best on a tablet or computer.
2. Open a web browser and type http://192.168.0.1 into the web address field.
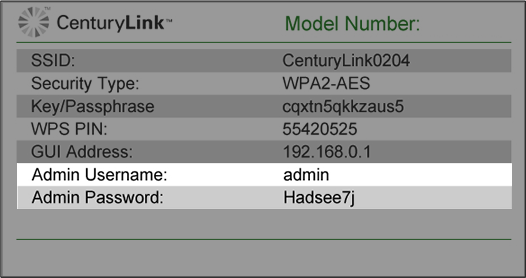
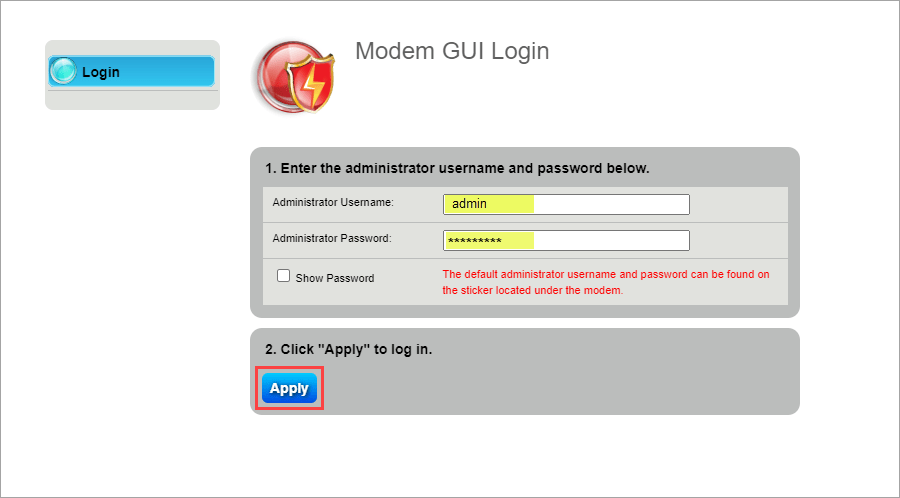
3. Sign in to the modem settings (GUI) using your Admin Username and Admin Password, printed on the sticker.
You can find the Admin Username and Password printed on the sticker attached to the side, back or bottom of the modem.
CAUTION!Do not remove your modem sticker. It includes your default Admin Username and Admin Password, which cannot be retrieved if lost. Your modem could become unusable without them.
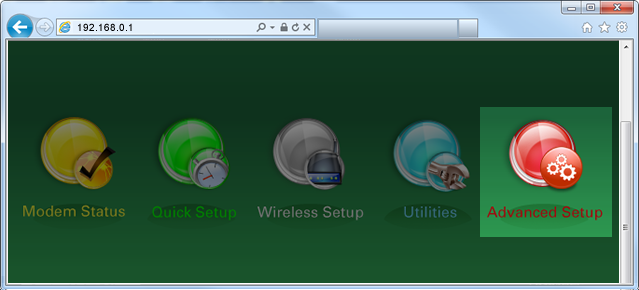
4. Select Advanced Setup in the main menu.
5. Select Access Scheduler in the left sidebar.
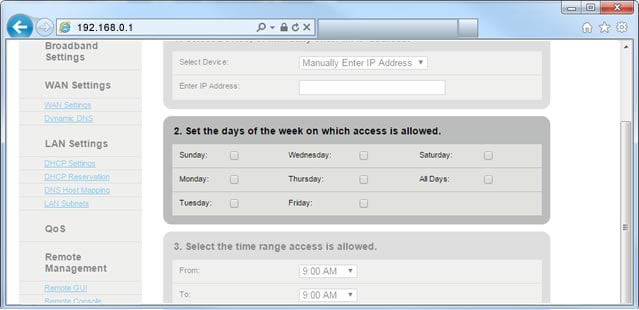
6. Select the device you want to schedule from the dropdown list, or manually enter the device's IP address.
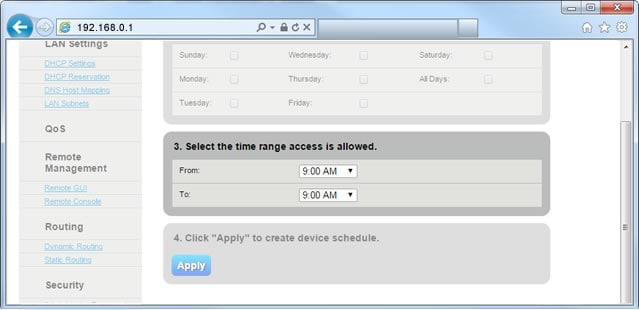
7. Check the boxes next to the day(s) you want to allow this device to access the internet.
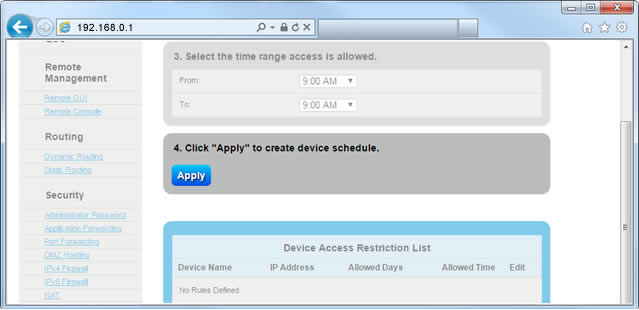
8. Set the from/to times to specify when you want to allow internet access.