We no longer support this browser. For an optimal experience, we recommend updating your browser.
Wireless settings on your modem
The wireless setup menu in your modem settings (GUI) allows you to control the wireless network in your home. Some models will offer both 2.4 GHz and 5 GHz setup options for several of the features. Read more about how to choose 2.4 or 5 GHz frequency.
Select from the menu below or watch a video about wireless settings.
Wireless setup menu options
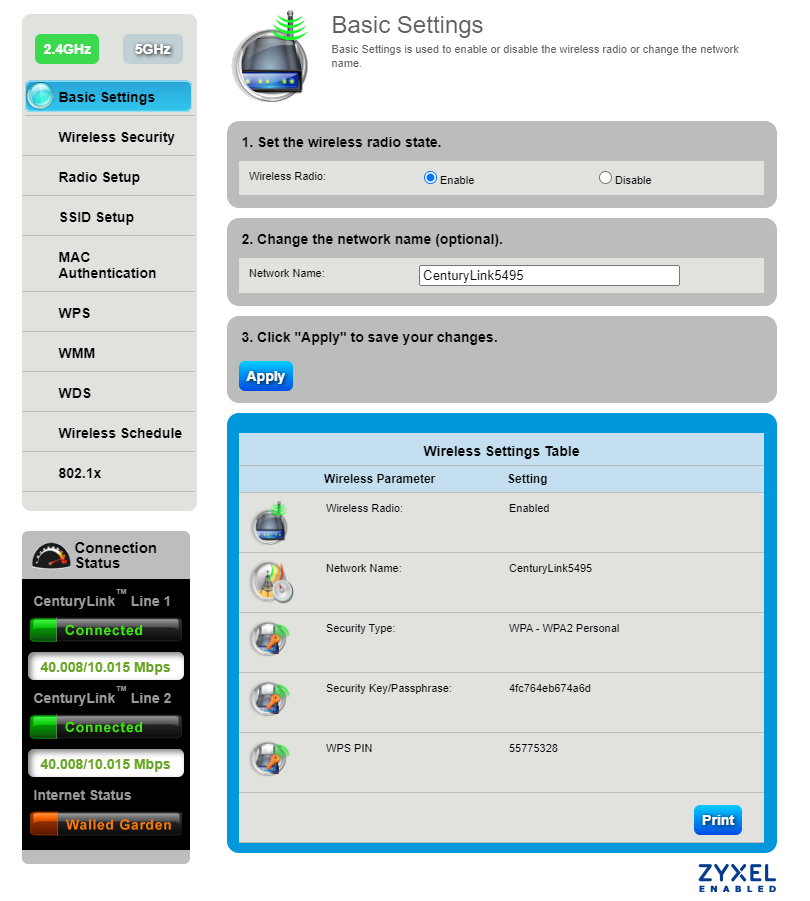
- Basic Settings: Enable/disable the wireless radio, change the network name (SSID), view the current security type, key/passphrase, and WPS PIN for the modem
- Wireless Security: Change the security type (WEP/WPA/WPA2) for your network
- 2.4 GHz or 5 GHz Radio Setup: Select the wireless channel, power level, 802.11 modes, spatial streams, aggregation, and MIMO power save
- SSID Setup: Create and manage up to 4 wireless networks (SSIDs)
- MAC Authentication: Create an allow/deny list for the WiFi radio on your modem using a MAC address
- WPS: Provides a secure way to share the wireless key between your modem and wireless devices automatically — learn more about WPS here
- WMM (2.4 GHz only): A Quality of Service feature that prioritizes traffic on your wireless network
- WDS (2.4 GHz only): Allows the wireless interconnection of access points via a wireless connection
- Wireless Schedule: Set disable times for your wireless radio
- 802.1x (2.4 GHz only): Combine wireless security methods using WEP or WPA with the benefits of a radius server
Wireless settings menu screenshots
Note: Your modem settings may appear slightly different from the images below, but the steps will be the same.
Videos: Wireless settings
Learn more about WiFi security
Top Tools
Browse news, entertainment, weather, and more.
Was this information helpful?
Support topics
About Lumen | About CenturyLink | Careers | Investor Relations | Newsroom | Legal | Privacy Notice | Tariffs | Customers with Disabilities | Site Map | Cookie Settings | CenturyLink in Your Area | CenturyLink.net | White/Yellow Pages | Centurylink Retailer
Residential | Small Business | Enterprise | ©2026 CenturyLink. All Rights Reserved.